Showing posts with label BOYCC. Show all posts

Monday, May 16, 2011

A Bounty of BOYCC Booty


 Our lilacs are in full bloom, and the aroma is heavenly!

This past week it's been a madhouse here, getting everything finished and shipped to California for BOYCC for this weekend. And to my delight, Mr. Pony came through the glaze fire fantastically! If you want to see more photos, check out his photo album

 
  Mr. Pony with his candy coating - finished just in time!

I was worried I made his directional shading too even, but it seems I did it just fine. His features have just enough accent without being overdone. The pigment also pooled in the features just as I wanted and the tube's glaze seeped onto the tail, giving this piece the more arty look I wanted. Though I do admit that I really liked him bisque, too, and I'd love to try finishing another piece just with an oxide.

Living up to his nickname, "Big Blue" brought out the blues of the glazes and underglazes applied to Mr. Pony. You can see hints of the purples and greens on various parts of his body, and depending on the light, these colors either dampen or "pop," which I think is especially fun. And praise be! Copper Adventurine finally made a coppery effect! It's not a whole lot, but I'll take it! 

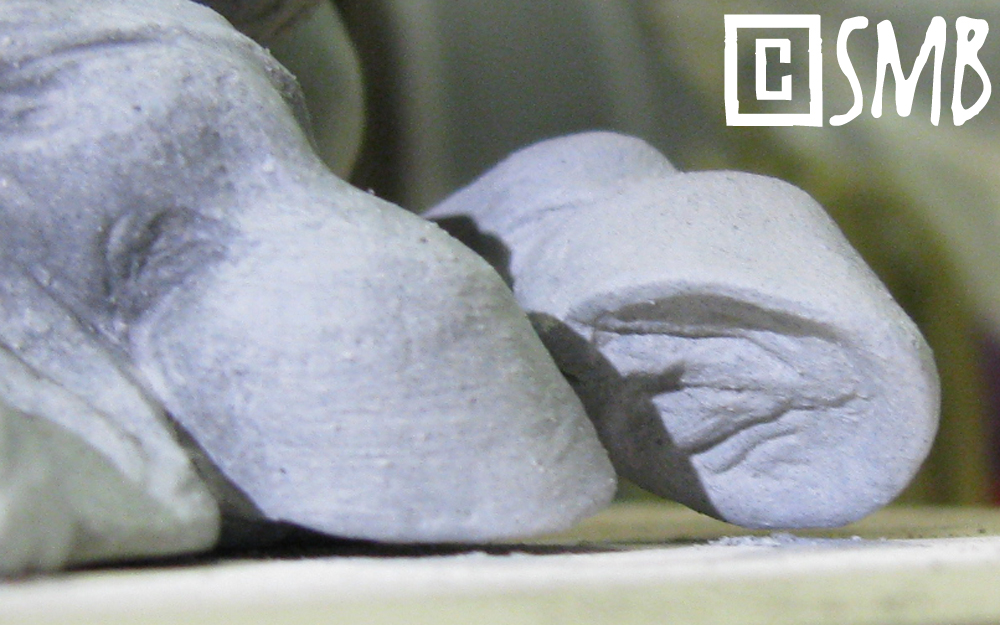
Woot! Check out those lovely smears of copper! That's my studio logo stamp impressed on the back of the tube, in the lower two-thirds right hand side of the photo.
 
But it wasn't all fun and games - Big Al threw in some monkey wrenches just to make sure I was paying attention....

 This is why kiln wash is indispensable! The glaze on this little guy unexpectedly ran off him and flowed onto my kiln shelf. Happily, I was able to pull him off thanks to the kiln wash because it creates a powdered layer that acts as a "release" for just this situation. Then I sanded off the glassy edge at his base with a grinding stone and my Dremel® tool.

And some of the glazes had a complete spaz. Yow! Brace your orbs for the horror....
  
Ack.
 
  Ack!
 
 ACK!
 
 
 ACK!
 
 AHHHHHHH!

I'm sending these eye sores down to BOYCC for kicks. I figure Joanie and Addie can find some unfortunate use for them.
 
But all the hard work paid off, and both Big Al and Maury delivered in spades...

When Laurie was here a couple of weeks ago, we spent a day playing in clay. She made a gaggle of wonderful little creatures, and I made these guys. I'm sending them down to BOYCC as fun little prizes.

And here are some of the awards I'm providing for my Challenge Classes. I'm sponsoring a bas-relief class, a Minkiewicz Challenge (large size) and a Minkiewicz Challenge (small size).


And here's a peek at some of the swag bag tiles - each one is different, and there are fifty in total!

 
Of course, Mr. Pony is my centerpiece contribution. Some lucky person will be taking him home! I also provided eight magnet sets for the peeps who are sitting at my centerpiece table ((below), so each person at my table gets to take something extra home.


So...what have I learned with all this, especially with Mr. Pony? 

In a word: GOBS. 

I discovered that I'm a really fast sculptor, and it's been my previous media (epoxy clay and oil clay) that have slowed me down. Mud is a different story - it can keep up with me. It's essentially the acrylic paint of sculpting mediums. Not only that, it also works with me, becoming a true partner in the process. Being able to just sculpt without impediment has been a thrilling experience, and this revelation is a new direction I intend to explore in earnest.

My tiles can be integrated together nicely using different hole configurations. This opens up whole new options for what I offer for sale, and even themes for new future designs.

The "slow fire" program in Big Al's computer brain is a most valuable tool. I've rarely used it before Mr. Pony, but I suspect I'll be dependent on this setting for many future projects!

Lastly, I learned to always keep an open-mind in the face of failure. If you think a process or medium is beyond your abilities, too difficult or scary - believe me when I tell you that you're probably very wrong. Very very wrong. Dive in, fearless and eager! "Success" or "failure" are empty judgments we tack onto our experience, not the truth of that experience. Whether we reach our goal or not, we gain insight that can be applied in some fashion in the future - that is the treasure. New options, new horizons, new methods, new ideas...new everything is there for the taking if you just make the leap. Take a risk. It's good for you. Certainly has been for me. I know I'll never be afraid again!

Thank you BOYCC for these invaluable lessons and experiences these past few weeks! Even though I'm unable to attend, this event still had a profound effect on me, and for that I'm eternally grateful. Thank you Joanie and Addi!

"So many dreams at first seem impossible. And then they seem improbable. And then when we summon the will, they soon become inevitable." ~ Christopher Reeve

Share/Bookmark

Friday, May 13, 2011

Mr. Pony's Candy Coating

Mr. Pony and buddies in Maury - before I rethought that firing.

Now that this guy has made it through the bisque fire, he has one more fiery gauntlet to run: the glaze fire. This usually isn't such a big deal because it's run at a temperature well below the bisque fire, Cone 06. In other words, anything that would have exploded already would have.

But one can't be too cautious. I'd initially put Mr. Pony and a gaggle of clay critters into Maury, my small kiln (as you can see above). In case you're wondering, "Maury" is short for Moravia, a location in central slavic Europe thought by archeologists to be the first place where ceramics were created purely for aesthetic reasons. 

Anyway, unlike my big kiln, Big Al, who has a digital programming pad, Maury is manual only and so he doesn't have the "slow" fire program that Big Al has. So when I turned on Maury, I realized that Mr. Pony was bisque fired on the "slow" setting in Big Al. Would anything other than that scenario cause him to explode, even in a glaze fire? Maybe. Regardless, I couldn't take the chance at this point. BOYCC is next week! (Btw: plane tickets are really cheap right now, so if you're thinking about going - DO.)

So I turned off Maury and loaded everyone into Big Al instead, along with all the BOYCC swag bag and award tiles. At this point it was 4am Friday morning. I set the program to "slow fire" and turned on Big Al...and hoped for the best.

Glaze fires are very different from bisque fires. Remember that glaze really is glass and glass needs time to cool, otherwise it'll crack, or shatter. This is why art glass works need to be annealed. Complicating matters, glass glazed onto ceramics needs to cool around a rigid bisque body, like a glove on a hand. Any disruption will result in cracking, shattering or crazing (not to be confused with crackle glazes). 

Thus the general rule of thumb for the cool-down period is to triple the firing time of a glaze fire, to allow the glass time to cool evenly in tandem with the bisque. So, in a sense, we anneal even a ceramic glazed piece, using our kiln as the mechanism. This means that since Big Al's slow 06 fire took 11 hours, that means the cooling time would be 33 hours. So if I fired him up at 4am Friday morning, I can't open him up until Sunday, about noon.

To say that this wait time is excruciating is an understatement, particularly since ceramics always - always - has a surprise waiting in store for you. This media dances to its own drum and at times it may invite you along to sashay, but more times than not, it's a mosh pit. Only those hardcore enough can rock...in making pretty rocks, practically speaking.

So getting back to Mr. Pony...he needed glaze. I'd debated about leaving the pony bisque with an oxide accent, but I figured with him being a functional piece (especially since he might be used as a vase -- read: water), the durability of an impermeable glaze was the ticket.

I finally settled on an underglaze "directional" airbrush treatment in vibrant colors. What I mean by "directional" is that the airbrush is held at an extreme angle to the piece, usually from underneath the features, so that shading is placed on the underside of the anatomical bulges and protrusions. Then clear glaze would be applied on top. This tends to flatter a realistic piece most. The tube would then have a drippy art glaze treatment. 

But I had to get him all done in one firing - there was no time for multiple firings for this guy. Luckily, my strategy allowed me to get him all done in one fell swoop!

Here's Mr. Pony with his blues and purples applied, with directional airbrush shading. The underglaze is pure pigment, and it's extremely fragile, being a kind of powdered dust. If I touched it, or even sneezed on it, it would be ruined. So once the pigment is laid down, I can't touch it. Lucky for me, his tube provided a perfect "handle."


Now for the reddish purples and greens.


Once he was underglazed, I airbrushed on his clear glaze, which is why he's all pinkish-white here.


Now for the tube. I Saran-wrapped Mr. Pony to avoid any art glaze from splattering onto him.


Here you can see the drippy effect. I used four glazes here. On the bottom is Copper Adventurine, a blasted finicky glaze that I have yet to get work well, but I figured what the heck - it's a tube. Above that is Blue Grotto, a new glaze that I have no clue how it's going to look. Again, what the heck. Above that is Cornflower Blue only because I wanted to use it up. On top of that is Sea Spray, one of my very favorite glazes (the tube's inside is glazed with clear and Sea Spray dripping down into it). However, glaze does its own thing...and kilns do their own thing. 


Despite any ideas of how I think this will all turn out, the reality is I have no clue. It is what it is - that's it. It all could come out completely different than what I envision - and probably will. Hence the excruciating wait. With fingers and toes crossed. Hoping.

But patience isn't one of my virtues. Not by a long shot.

"patience, n. A minor form of despair, disguised as a virtue." ~ Ambrose Bierce, The Devil's Dictionary

Share/Bookmark

Monday, May 9, 2011

Pony Bisque and Beyond


HAZZAH! Success! Mr. Pony made it through the bisque fire intact and unscathed! Now I can start breathing again. I'm going to be honest - I didn't expect him to survive. He has a solid head and neck and I'm new at this and I sorta stumbled through him...so truth be told, he beat the odds! Big odds.

I suspect a large part of this happy outcome was the clay. It's a low-fire, porous earthenware (Laguna EM-347 Whiteware with grog) and so it's far more forgiving than a mid-fire or high-fire clay, such as stoneware or porcelain. What I mean by that is that air and water have a better chance of escaping during the fire because the clay is more "spongy." In contrast, mid-fire and high-fire clays are less porous (and many turn vitreous when fired to maturity), so any air or moisture that wants to escape tends to do so explosively. And like the Michigan Model Madness show tiles, there wouldn't have been time to recreate a replacement if things went wrong with Mr. Pony.

I've also been holding my breath over Mr. Pony for another reason - I desperately wanted this project to succeed because I really wanted to create work with this approach. So because Mr. Pony didn't pop, I now know this mode of sculpting is something I can do. I don't think I've ever been this excited about new prospects in a long time! 

Nonetheless, I took cautious steps with the firing because I had very little idea of what I was actually doing with all this. The thing was, I wasn't only worried about an explosion, but also about cracks, knowing they would be inevitable since I was so inexperienced. So I put him through a "soft fire" first, hoping that would reveal where cracks would occur so I could fix them before the final fire, which would save time and hedge my bets even more.

A soft fire is a firing well below the clay's mature fire, so in this case, Mr. Pony's soft fire was at Cone 010 rather than the mature fire of Cone 04. When it comes to the "0" before the number, think of it as a negative symbol in mathematics, meaning that the higher the number behind the "0", the cooler the fire.

And the soft fire worked like a charm! I was quite surprised to find how few cracks occurred (that tells me I'm on the right track), and also how easy it was to fix them - simply wet the area, apply more slip and work it into the crack, then blend with a wet brush. Then I put him through the mature fire of Cone 04...and ta-da! A fully fired pony, ready for glazing...

Mr. Pony is bisquey goodness. Phew!

(Left) You can see how I blended the tail into the tube. I'd originally thought of attaching the tube on the other side of his hinder, but then I'd have to add more tail hair and have it wind around the tube in the opposite direction. In the end, I decided that wouldn't only make the tail excessively thick, but it would make the design awkward. By placing the tube on the side the tail was already laying solved that problem and created a more flowing design.

Here you can see the tube, which turned out surprisingly well. No cracks anywhere and it fired perfectly. I actually thought the tube would be a real problem only because it was so simple to make, and with ceramics "easy" can be frighteningly deceptive! I also expected a mess of cracks between it and the tail connection, but nope!

Here you can see a crack that occurred on the inside. Having appeared during the soft fire, I decided to leave it unfixed. It spoke of the new experience and the process, so I liked it. That's probably not the best attitude to have when it comes to ceramics, but well, I've never been one to follow convention. Aren't we the sum of our good and pesky points? Well, so is a piece of art work.

 Here you can see the grog creating a "grain" in the clay. Unlike my other work, which needs a smoother surface, I think clay lends itself to a looser finish. It's a reflection of the media and I like that to show.

Now I'm presented with a conundrum for glazing, due to the groggy texture of Mr. Pony. If I use a directional spray with a colored underglaze, it will pick up the grain along with the details and sculpting. Will that be too distracting? On the other hand, should I simply apply a colored glaze? While it would dampen the effect of the grain, it would obliterate most of the details. Given a choice between the two, I know I want to avoid obscuring all the details I worked so hard in infuse in the piece, so I'm leaning towards the directional spraying paired with some transparent colored glaze...and simply hoping for the best. I'm praying that may be the best of both worlds.

So either tonight or tomorrow, I'll start glazing this fellow. What I do know for sure is that my beloved crackle glaze is out. All those little cracks would allow water to penetrate into the clay and if the winner of this piece wants to use him as a vase, that would compromise his long-term durability. I also know that realistic colors are out, too. Not only wouldn't they work well with the grain, but that approach just doesn't fit the feel of this piece. Realistic glazes have their place, but this line of work really isn't one of them, at least in my view.

Nonetheless, I need to finish this guy before I dive into the BOYCC swag bag tiles. All that art glaze combined with my clumsiness threatens to contaminate Mr. Pony if the two are created side-by-side. I know me and art glaze, and we tend to be a tornado together! So wish me luck!

"I await joyous surprises while working, an awakening of the materials that I work with and that my spirit develops." ~Odilon Redon

Share/Bookmark

Thursday, April 21, 2011

Tools of the Trade

 A sneak peek at one of the rascals who started all this! Yeah, I bet you can figure out what kind of animal this is...well WELL WELL!

The most important - the best - tools of any artist are the mind, the soul, and the imagination. No art can emerge without this creative trifecta. But in order to materialize their alchemy, an artist needs tools.

Luckily we're born with the  most exceptional tools imaginable - our hands! Personally, I interpret this as a sign that nature designed us to be creative. Honestly, all good things in human nature come from positive creativity, perhaps because it requires openness, humility, joy, reflection, and respect for the internal world of others. So I find it no surprise that lots of good things derive from creativity, some of which I wrote about in a 2010 article:

Studies show that our brains slip into a meditative state and release serotonin, dopamine, norepinephrine and beta-endorphins when immersed in creativity. And the more we engage it, the stronger that positive feedback loop becomes cemented into our neural net. Quite literally, we become addicted to our creativity. The effect can be so profound that our brains actually re-wire themselves to expedite these pathways. For this reason, artists tend to be most balanced when allowed to work in the studio on a regular basis. It’s why we derive such deep, penetrating joy from our creativity.

Experiencing this effect on a daily basis, I've long thought that every person should have some form of positive creative outlet. But creativity doesn't mean just visual art, but anything that requires the implementation of creative expression, from writing, cooking, dancing, gardening, music, architecture, etc. Putting our hands to work to express our inner selves gifts us with a path, a profundity, and a voice...and don't those things stew in the human soul by nature?

On the left is my ever-handy Microstamp® logo stamp I use for sculpture. Lynn Fraley referred me to their product and I can vouch that it's fantastic! It'll be a lifetime tool. On the right, with the goldfish floatin' around inside, is one of the minions of Page Up® paper holders that populate the studio.

But I digress...back to tools. Such gizmos are the means by which our voices can be expressed and they range from the humble hand to the found object to the custom-made contraption. Every artist has a pile of tools and often an even more exclusive group of favorite ones. Tools also can be as unique as the artist, revealing quite a bit about how he or she works simply by its condition or design. Each art form demands its own set of specialized tools, too, and even different media can demand specific implements. 

Since I work in such varied media, most of my studio is strewn with various tools...they are taking over! But that's OK...they're my little partners in this madness. So along those lines, I thought you might be interested in the tools I've been using to create Mr. Pony, and his future ilk...
 
 Here's a line-up of the usual suspects. "B" has little balls on each end, which are really useful for details, especially inside nostrils and ears. "C" is my steady partner for all clays, and my primary sculpting tool for epoxy (its epoxy partner is encrusted in the stuff!). D-H are various loop tools. "J" is my ever-present set of calipers - I have five of them so I'm never without! "K" is my Microstamp®. L-M are my various smoothing brushes for earth clay ("L" is that flat brush I mentioned for the veining yesterday).

 
Here's "A" from above. This custom-made tool from Bison Studios was a gift from Joan Berkwitz a couple of years ago and has proven to be indispensable! So much so that if you see it covered in clay, you know I've been working in the ceramic studio. I even kept the cool box it came in!

Here's "I" from the line-up. This tool was a gift from Lesli Kathman, one she made herself. The interesting thing about this puppy is that you can make a whole slew for yourself, too! Just take bass guitar wire and some brass tubing (available in many hobby stores). Simply bend the wire into the shapes you want and insert the loop into the tube, and crimp the tube ends with needle-nose pliers. Super for earth and oil clay! It also leaves a really appealing tool mark, which I plan to leave on some ceramic pieces.

 
 Youth Taming the Wild, Anna Hyatt Huntington, stone, 1927. Brookgreen Gardens, October 2009.

I'm sure as I develop this line of work over the years, new little partners will be added to the party. I can't wait! I have a deep fondness for my tools...they represent so many memories past and more to come. Each one has a story and each one plays a part in mine. So here's to our tools! Always dependable and at the ready to help us forge our path! Hazzah!

"Let the technical skills you acquire guide your hand but also have the courage to listen to your heart." ~ Ted Smuskiewicz


Share/Bookmark

Tuesday, April 19, 2011

A Final Fiddly Bit


Now that I've processed those revelations thus far, I had another challenge regarding details: veins and moles. These two features aren't all that easy to sculpt, in any medium. 

Anatomically, their design makes them a real challenge to translate because they're complex and fleshy. Veins also are bilaterally symmetrical and the major ones follow prescribed anatomical patterns, meaning that I can't just slap them on any which way. Veins also are dependent on the specific situation of the "moment," and even are influenced by the breed depicted as some breeds have "thinner" skin than others.

On the other side of the coin, veins and moles have artistic concerns. They're a study of balance, of achieving a delicate harmony between subtlety and emphasis. Scale also plays a big role because gigantism in these features will surely sink Mr. Pony as surely as putting elephant ears on him!

So early in the sculpting process, I wondered how to achieve these features in clay because I tend to add them later, rather than sculpt them as I go. But the problem with clay is that complications arise when applying delicate bits after the fact, which I won't go into because it's rather technical...let's just say it's tricky.

As an experimental workaround, I decided to carve a series of grooves where I wanted the veins to go, to give more surface area and a "seat" for the new clay.

 Here you can see what I mean by the grooves.

 Here's a close-up.

I dampened those areas with a wet brush, waited a minute, and then dotted slip along the grooves with a fine flat brush, just to get the clay mass onto the body. I let those areas dry a bit, and then sprayed them with a light mist of water from a spray bottle to infuse a degree of "give" and "life."

I then used a sculpting tool to define and clean them up, also fiddling with them to blend them into the body. After letting them dry a bit to "rest," I gently smoothed them with my brush to set them "back" into the skin - and voilà!

 
 Finished veins and moles.

I'm really happy with how they turned out! The veins have a good degree of fleshiness and a nice balance in intensity. As you can see, the moles are more suggested, which I think works better for clay. If they crack as they dry, I'll just repair them with more slip. The biggie is firing -- I hope all this doesn't pop off! Hey, it can happen. But I'm hoping the "seating" will help them cling on, like anemones to a rock. So tomorrow - to connect him to his vase tube!

"The world becomes fresh and hopeful and new, when we create." ~ Lynda Lehmann
 
NEWS FLASH: BOYCC has some registration openings, so if you've been thinking about going, now is your opportunity! Don't miss it! Free workshops and seminars, catered meals, lots of swag and goodies to win, gobs of gorgeous "shiny ponies" and great times with great people! For more information, go to the BOYCC website.

Share/Bookmark

Monday, April 18, 2011

Fiddly Revelations

The BOYCC centerpiece pony is almost done!

I'm in the home stretch! Many sculptors know this as the "fiddly bits," the stage where attention must be paid to little details, final adjustments and loose ends. So close! And I'm happy to report that earth clay accepts and holds detail just as good as epoxy, and better than oil clay.

Also at this point is the smoothing process. When I work in epoxy or oil clay, I use a solvent with a soft, artificial brush to smooth out the surface, softening the tooled features and creating a nice burnished surface. For epoxy I use rubbing alcohol and for oil clay I use Goo Gone. Yet despite the seeming ease this implies, smoothing can be quite tedious with oil clay and epoxy. Indeed, it can take hours, even days in the case of epoxy, which also may require sanding once the material has cured.

On the other hand, such drudgery doesn't exist with earth clay! This stuff takes to it so well, in fact, that this otherwise dreaded step becomes a delight. Even better, I get to use just plain ol' wholesome water instead of smelly chemicals. Better still - no sanding or using the Dremel tool. To add the cherry on top, being able to go back and tweak even days after a session is a novel concept for someone seasoned in  self-hardening epoxy clay. Without a doubt, for me, there just isn't any better sculpting medium than this glorious goop - humble mud.

Nonetheless, I still was concerned how it would respond to smoothing. Tiny details are important on a large piece such as this and, more importantly, this clay is full of grog. So would these details melt away? Would the brush scour them off even with a light touch? Would the grog hose it all up? 

The good news is: "no," "no," and "no." The clay took to smoothing just fine, and in fact far better than oil clay and almost as good as epoxy. This is a revelation. But looking at him now, I admit...I rather liked the tool marks. I miss them. Another revelation. And sure, groggy bits are here and there, but I like them. They speak to the media and the process. More revelation.

I deduced that the clay took to smoothing so well because, like epoxy, it's capable of being "melted" in place to set the details back "into" the surface.  In contrast, oil clay responds to this method by simply getting more gooey and messy, and so its detailed edges have to be softened around, like icing around the sides of a cake. All this means that the fiddly steps go much slower with oil clay. For example, it can take me a few hours to smooth an oil clay plaque, like Reflective, but only about 30 minutes to smooth Mr. Pony.

I also discovered two more bonuses unique to earth clay. First is the ease of sculpting manes and tails. This may not seem like a big deal, but trust me - it is to me. I've long struggled with hair and still consider it the hardest feature to sculpt. That may seem counter-intuitive, but believe me when I tell you that it's outrageously complicated. 

This is because the flow of hair is both passive and random, dependent entirely on the physics of the "moment" between the horse's moving body and the physical reality that a horse lives in, to include centrifugal force, wind, objects, knots, etc. Moreover, not only does hair have texture, but it's comprised of individual strands that combine into layers and clumps that all work together to create elaborate effects within the flow. In short, hair is chaos in motion. So any interpretive hiccup that contradicts all this will compromise the illusion, as seen in many nice realistic sculptures weakened by an ineffective translation of hair. I know - I created many of them in my early work!

Adding even more to this complex brew, the flow of the mane and tail is an important design feature for the composition of any piece. Honestly, they can make or break a sculpture. So beyond all the physical concerns, convoluted artistic considerations exist, too. What all this means is that I can't just slap on a mane and tail any which way I feel like because they first require context and composition.

Predictably then, I've stumbled clumsily through many hair variations from the "soft serve," rope-look (or "big hair," which in hindsight I cringe, "What was I thinking?"), to the  drippy-look, to the sheet-look, and to anything in between. Only recently have I been achieving something closer to my goals, notably seen with Elsie

Clay is the only media that allows me to achieve the hair effects I've wanted all along...effortlessly!

Yet with Mr. Pony, I realize now that the problem wasn't me - it was the media! Both oil clay and epoxy lend themselves to the rope-look because of how they behave under the pressure of a sculpting tool. But earth clay is entirely different in that it doesn't "rope-out" under tool pressure and, fortuitously, it breaks. I say this because the unpredictable bits that bust off create the random look of hair far better and easier. In a sense, it's the clay that sculpts the mane and tail with my hand being only a compositional guide. Yet another revelation, and one I'll take back to epoxy and oil clay.

Second has been the palmar foot, or the underside of the horse's hoof that has the frog, sole, bars and toe callus. Despite appearances, this feature also is difficult to capture in epoxy and oil clay because of its natural texture, effects of abrasion and soil clinging to it. The problem is that both epoxy and oil clay want to be smooth under the sculpting tool and solvent, in direct contrast to some of the features of the palmar foot, which means I have to sculpt texture back into this area.

The palmar foot, rendered far better in clay!

Yet with earth clay, the opposite is true. So if I let the clay harden a bit, I simply use a blade-like sculpting tool to carve out the palmar foot, letting bits break off as needed and bingo - realistic textures where they need to be, automatically. Also produced is the realistic look of abrasion, exfoliation and soil, important details that are difficult to recreate in epoxy or oil clay. Another revelation.

A studio revelation: If I'm going to make a habit out of this art form, I definitely need a new ceramic sculpting set up! Those preciously stacked tiles and the need to contort my posture to accommodate the clamp light have gotta go. I'm shopping for sculpting pedestals this week and toying with better lighting arrangements.
 
All said, however, I'm happy to report that Mr. Pony isn't done teaching me yet. More on that tomorrow, so stay tuned! Same muddy time, same muddy channel!

"Achievements of life are momentary, but realizations are longer lasting." 
~  Avtarjeet Dhanjal 

Share/Bookmark
Related Posts with Thumbnails