Showing posts with label Etsy. Show all posts

Thursday, July 26, 2012

It's a Mud Hunt! A Mud Hunt!


All my hard work this month has paid off with a passel of new porcelain goodies in my Etsy store! You'll notice lots of fresh new ideas in this offering, from the RunequinesTM mosaics to the RelicRocTM pieces. And if you explore the sold pieces, you can see even more fun new ideas that got snapped up immediately.

Now some pieces have been withheld for auction, either because they're extra special thanks to serendipity, or because they won the round of "eenie meenie miney mo."

The OOAK Trinket Box #4 (above) is one of those pieces withheld for auction, all because of that random cracking around the heart. Who knew? Gotta love mud and fate!

So now you know why I've been so quiet on this blog for so long. Most of all though, as we've been getting back on our feet after three years of total chaos, I've been trying very hard to balance work with getting myself back on the mend. I haven't been able to create as much as I would have liked, but as the Christmas fiasco taught me...I must pace myself.

CBCM Reflective #7 is another piece that will be offered at auction soon. This piece took a lot of work since an Arabian head is so radically different from the original Reflective head, but he came out pretty cool. You just have to keep at it, especially when you want to run screaming to the hills.

That said, I hope to rectify my absence soon now that this sale is humming along and I can gear up for new production, such as for Christmas and new sculptures! And here's a great bit of newsBarry tells me the CubequineTM molds are done and ready to pop out horsey cubey goodness! Woot!

In particular, however, I want to get started on the Christmas 2012 porcelain ornament and some original busts and bas–reliefs in stoneware and porcelain. Plus finish the sculptures that have been orbiting half–done here for way too long. All in all, I can't wait to get started! Again!

Now if you want the inside scoop for when these pieces go up for auction, plus all the other debuts and sales goodies that pop out of the studio, subscribe to my new email newsletter! It's the exclusive source for all my sales bulletins!

So until the next poststay cool in this hot weather, get out there and enjoy yourself and, above all, stay creative!

"Nothing, of course, begins at the time you think it did." ~ Lillian Hellman

Share/Bookmark

Friday, February 3, 2012

Back To Work

One of the new ways my ceramic tiles are making their ways to new homes...in mosaics!

After my doctorprescribed three week "pasture rest," I got back to work in earnest, getting knuckle deep in mud once again. I was particularly eager to finalize the various new applications for my tiles and get them up on Etsy pronto. At the top of that list were mosaics, an art form I'd long admired and which my handmade tiles were perfectly suited. Just like with beads, mosaics married mud and glass together with splendiferous results!

So the opening photo (above) is one of three large 9.5" x 9.5" mosaic pieces I put together, and here are the other two...

 
All three sold in the blink of an eye, something I really didn't expect. I thought they'd sit for months! It was so cool to put these pieces together, choosing just the right components and oozing the grout into the spaces. Forget spatulas or clothsfor me fingers are the best grouting tools! squish squish squish

I must admit that trepidation creeps in when I put new ideas up for sale only because I'm not so sure folks will think they're cool, too. Because I have to also admit that my various creative excursions can be quite random such as, for example, the new Shadow Horses...

On top is a pressing of my Welsh Cob (Section D) sculpture, Dafydd. The middle is from my RESS basrelief piece. On the bottom are two separate pieces pressed onto one slab, those being Imp and Vixen respectively.
Also offered are sets of "undressed" pieces for the buyer to festoon as they wish. I encourage folks to dress 'em up themselves and resell those finished pieces. It's even been suggested they'd make super pendants for necklaces. So true! It's fun when we get to "play together," and when you do, please send along pix so I can feature your pieces on the blog! And some of these showcased Shadow Horses are still available.

These "cameo" pieces were created by pressing my selected sculptures into a slab of clay using a "squish n' roll" technique. How you squish n' roll influences the profile and manifestation of the details, making each one unique. Then the pieces are bisque fired and then glazed, with the glaze being strategically wiped off the high points to make the details "pop." And into the mature fire they go. It's a meticulous, timeintensive process, but the results are really cool. I especially like how the glaze accents the reversal of the sculpture to produce a unique kind of basrelief.

But the curious thing about this project was that certain sculptures really lent themselves to this approach while others totally faceplanted, and for reasons I can't really explain. Totally counterintuitive reasons, really. But it was sure fun finding out who was squishable and who wasn't! As expected though, only the transparent, glassy glazes worked for this project since the more opaque glazes totally obliterated the detail.

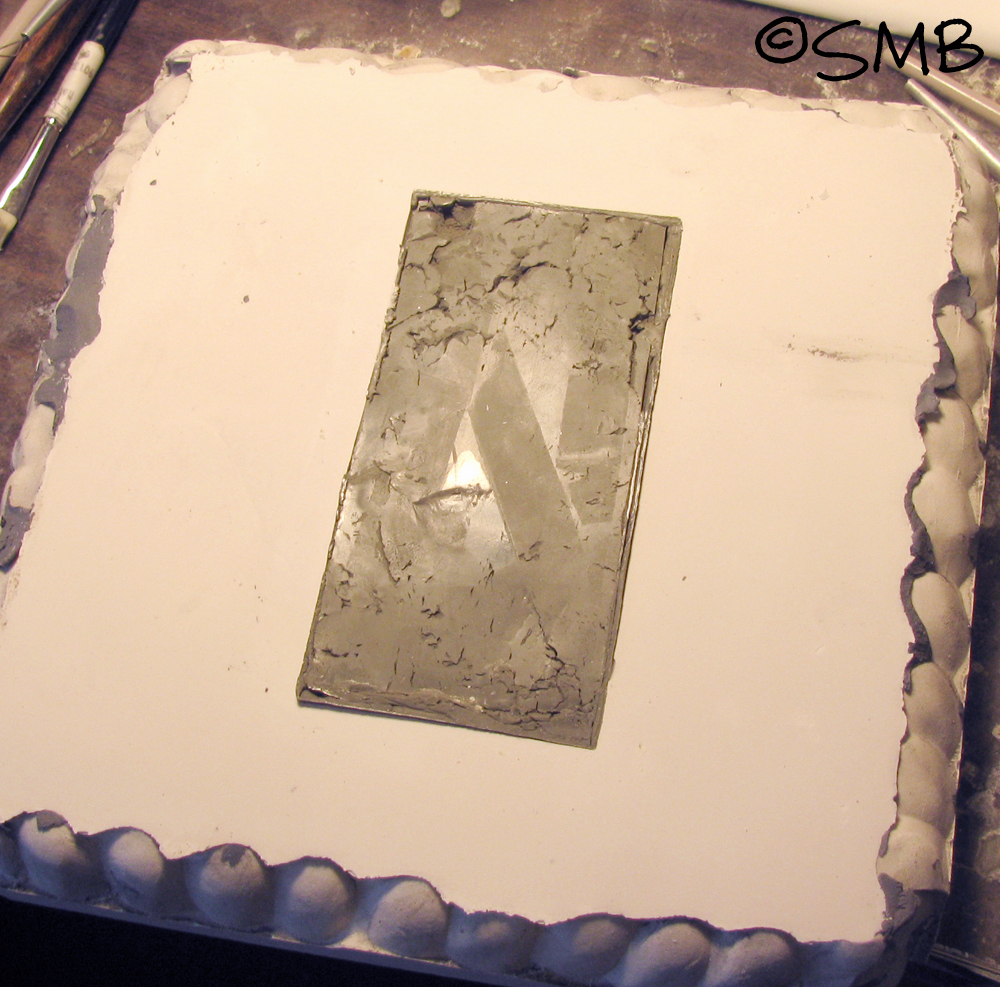
Now I'd really like to try some oxides with this idea along with making molds from some of these "negatives" to give me "positives." There are lots of uses for the positives, especially for a certain new series I'm currently designing. As a hint, I have a deep fascination for ruins that feature horses in basrelief (like the Elgin Marbles) and I want to pursue that idea in earnest now that I'm getting a handle on tile pressing and free sculpting stoneware and porcelain. Lots of ideas brewing for that. In fact, if they don't explode in Big Al, the first offerings along those lines, featuring the Shadow Horse effect, may be available soon in the store.

Anyway, I offered quite a few Shadow Horses in this current Etsy cornucopia and waited in bated breath because they're so, well...weird. Boy, was I happy to find that many of you appreciate weirdness, too! But I'm not sure these critters will become a regular item in the store because they simply consume too much time to make. They're really better suited for periodic romps when the mood strikes.

As for the name, I decided to call them Shadow Horses rather than "cameos" only because I liked the idea of them being the "shadows" of the originals. Like antimatter. Like ghosts. Considering it further, it would be fun to try this technique with the entire body of one of my sculptures, which I somewhat attempted with this piece. And I gotta sayI can't wait to see how Dante squishes!

Another random addition to this first 2012 offering were these fun magnet grab bags, made from impressions of my various works in midfire porcelain. Most of them were made for use as glaze test chips, but I got the idea for magnet sets midstride and so invested more time to make them presentable after they served their purpose.

 
Some are still available!

While lots of fun to make though, they ended up eating more time than expected only because the ruboff glazing technique takes so much work (and I'm so darned picky). It eats up lots of glaze, too, and on top of that, between the touchy clay and the even touchier glazes, I lost about 50% of what I actually made. So I'm not sure if this idea will be revisited anytime soon. Test chips perhaps are best left as throwaways. Though there is the idea for mosaics. Hmmmm....

Onward! Another debut was a new shape: a circle! Adding spice to the mix, unique flourishes were pressed into the clay by hand, along the border between the edge of the square stamp and the edge of the circle. That was a blast! It was such a hoot to grab everyday objects to see what kinds of effects they'd produce.

 
Here's a new circle porcelain piece still available in "the festoonery."

New, too, were the porcelain coaster sets I offered. This one got snapped up quickly.

This coaster set is still available. The results are hardearned, lemme tell ya. The loss rate during production is alarmingbetween the mid–fire porcelain and the eventual glaze effects, I lost one for every one I made. But I think I know why, so I'm hoping the loss rate on my next batch won't be so outrageous.

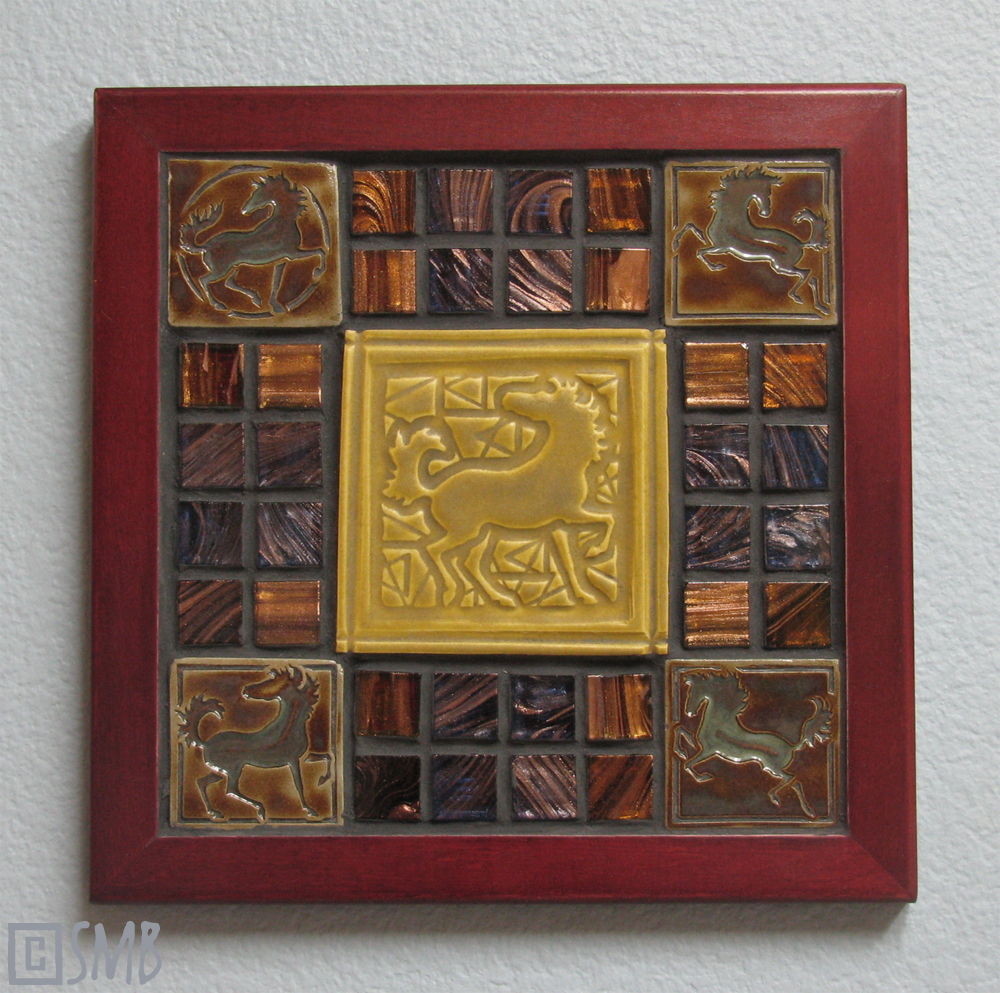
The almighty circle also made its way into mosaics such as this piece here, which is still available. It showcases a rather rare stamp design, the "draft horse" version of one of my Dancing Horse stamps. I liked how the black frame set off the tile so well, so I intentionally chose dark mosaic bits to let the tile shine.

Overall, I really ended up liking the circle shape a lot. It has good "palm feel" and reminds me of a medallion or medal. Of course with that came a blinding influx of new ideas, but as per my new motto, "manageable bites," I instead made notes for next year.

Also new were various framing schemes for these new pieces, such as these... 


The top two pieces are sold, but the handsome bottom piece is still available.

What may not be readily apparent in these framed pieces is that these are 3" stamps adapted into 4" tiles. For far too long (than I care to admit), I anguished over how to achieve this result quickly and easily since nearly all tile accoutrements are made for 4" tiles. But it was imperative to maintain the smaller 3" measurement to keep the Dancing Horses (and pieces like them) affordable as single pieces. 

All that extra space along the edges tormented me for what seemed like ages, and I spent quite a bit of mental energy cogitating elaborate workarounds. Somehow I had to avoid duplicating all those stamps in the larger 4" size because not only would that have been prohibitively expensive, but would also eat into the precious studio space that's becoming a rapidly diminishing resource around here. 

So in typical Minkie Modus Operandi fashion (of "just do it and figure it out later"), I blindly dove in when I finally got my 4" tile cutter. It was the staring at flats full of 4" squares imprinted with my 3" stamps that did the mental trick, and the solutions instantly popped into my head. As natural as breathing. So natural, in fact, that I'm still sorely irritated at myself for overthinking the problem!

What's more, the natural solutions are infinitely more flexible and interesting than any of my conceived workarounds! Blarg. Durhay Sarah! Can you be any more stupid? No wait! Don't answer that! Anyway, it's good to know that all tile accessories are now within grasp, in an easy, affordable and adaptable way.

Anyway, back to the Etsy store...also offered were new designs, such as this piece...

The new Solar Stallion in stoneware in "Rust," offered as a small colorway edition of twelve.

The glaze for these twelve pieces is actually an iron oxide applied and then rubbed offa lot of rubbing off. So while I love the rustic touchy–feely finish, the process is the kicker. See, the glazing method is tedious enough, but mix that with a rather irksome glaze and, well...let's just say this finish won't be put into production. The problem is that the oxide tends to smear and restain rather than just go the heck away, meaning that these twelve pieces took a lot of work!

The complement to this piece, the Moon Mare, has been delayed since her design needed retooling and thus a new stamp made. But stay tuned! She'll be available later this year. [It should be noted that these pieces were originally designed for my Runehorse line, but took on a life of their own and inspired an entirely new series. So the "Rune Horse" stamp on the back of these current Solar Stallions will be a bit of a novelty very soon.]

Another unique item in this sale is a festooned Dancing Horse in porcelain, with a brand new hole figuration of one hole on the top and two on the bottom...

This particular piece is a reverse impression of the actual stamp, taken from the matrix board provided by the stamp manufacturer. If you notice, this is the old "head down" version of the current "head up" version now in production. This piece turned out so gorgeous, I'm sorely tempted to keep it! It's still available...for now.

But not to be outdone, lots of regular items pepper the store shelves, from the Dancing Horse singles to all sorts of festooned pieces. Also back are the popular Prancing Pony magnet sets, such as this one...

The fourpiece Prancing Pony magnet set, "Summer Camp," which is still available

To shake it up, I included some porcelain Prancing Ponies to experiment with the medium in this manner. After all was said and done, however, I decided that porcelain is better suited to limited offerings rather than regular production. Stoneware it is then, and the new fancy stoneware clay I recently got is beckoning!

So this weekend I'll be getting the sold items packed up to ship off to their new homes as well as finishing up a couple of side projects. I'll also get back to those promised porcelain basreliefs (scheduled for sale in about two weeks) and continue with the CBCM Reflectives.

Exploring the mosaic theme further, I'm considering incorporating some of those basreliefs and perhaps a CBCM "Reffy" or two into mosaics as well. Then I'll redirect my attention to getting Dante underway and completing new sculptures for 2012, including some clay originals. Very excited! I can't wait!

So as needed as that pasture rest was, I'll tell ya whatit's great to be back up and running again. Back to the good ol' blessed routine. The creative habit. Now the wiser, this addiction is a good thing made even better with a more reasonable pace and less complications. Purpose. Simplicity. Clarity. Serenity. It feels fantastic. Hello, world! I'm back!

"Be regular and orderly in your life, that you may be violent and original in your work." ~ Clive Barker

Share/Bookmark

Sunday, November 6, 2011

A Passion for Porcelain


As I mentioned in the previous post, I'm having a torrid love affair with slipcast porcelain. As I also mentioned in that post, I got a crazy hair beyond just casting the unicorn. My eyes wandered over to my other bas-relief molds and gave me fiendish, Grinchy ideas. Hey, why not? What else are fiendish, Grinchy ideas good for?

So ta-da! Here are the fruits of our passions...

 Here's a set of my Rune Horses in porcelain, beaded as a set.

 Here's a selection of the four Rune Horse "C" pieces, beaded in different ways. Two great things that go better together: porcelain and glass!

 And here are the three Rune Horse "B" pieces given the same treatment. 

A note about those Rune Horses: these designs are being retooled for tile pressing rather than slip casting. This means they'll be redesigned into the standard 4" circle (and another version will be reset onto a 4" square) to allow for greater versatility with the end product and to open up the the possibility of installations. That means these staggered smaller sizes will be discontinued very soon because the molds are near their end and I won't be making replacements. Anyhoo...onward...

 
 Here's a trio of busts, now in porcelain and beaded as a set.

Here are more, only sold individually. The piece on the far left has a hook in the back for easy hanging on the wall.

Finally, here's the selection of small rectangle plaques with beadery. Each will be sold individually.

Its so exciting to be slipcasting my bas-relief work in this marvelous stuff! It opens up new ways to offer these and future pieces, which is such a tantalizing prospect for the bas-reliefs coming down the pike. All of them will be available for purchase in my Etsy store tomorrow, so stay tuned! 

Also stay tuned for the Reflective plaque in porcelain, to be debuted in the next post...

"All we are given are possibilities – to make ourselves one thing or another." ~ Jose Ortega Y Gasset

Share/Bookmark

Friday, November 4, 2011

The Myth Made Real


All packaged and ready for new homes!

It's been a steep learning curve here the past month, exploring the nuances of slipcasting porcelain. Phew! The cliff notes to this two month epic: I'm passionately in love with this stuff. A torrid, shameless love affair! Wanton! My passions were aflame, my breasts were heaving, my loins were...well, OK, I'll spare you. But this clay is definitely as magical as the subject matter I chose for my first foray - a unicorn

I made an open-face plaster mold and just poured the slip in, letting it dry and firm up just enough to pop out easily. Using that "button" technique with a piece of porcelain clay really helped matters, too. I was able to cast about five unicorns a day with this approach.

The tools of the trade, with some greenware made earlier that day. The extra greenware porcelain is put back into the dump bucket and used for future castings. Ceramics are wonderful - very little waste and lots of recycling!

 
Here they are all lined up, (left) original oil clay from which the plaster mold was made, (middle) greenware casting and (right) fired porcelain casting. Pretty impressive shrink rate between them!

 
Here's a close-up of a greenware casting (left) and the finished fired porcelain result (right). Each piece required a great deal of cleaning and tweaking to get just right. A labor of love.

 
And voila! The finished result! Well worth all those long hours and determined effort. I decided to leave the piece bisque to showcase the sculpture itself and preserve all the details - I vastly prefer bisque porcelain to glazed for this reason. To my eye, it's an ideal medium for highlighting sculptural aspects, so elegant and lovely.

All packaged and ready for Etsy this weekend! 

I am absolutely thrilled to have completed this ambitious project successfully! Slipcasting porcelain opens up entirely new horizons for my work, especially for my bas-reliefs. In fact, I got a bit wild n' crazy along those lines, but I'll leave that for a (soon) future blog post. I also found that certain post-fire flaws can be fixed, along with contriving a solution for the warping problem (again, I'll leave that for a future post). Indeed, the experience was so positive that I decided to make this unicorn ornament an annual series, so next year I'll come out with a new design. 

I gotta say, though, this project relied on my aggressive naivete and militant optimism. I had no idea what I was doing, simply forging ahead with what I knew about slipcasting earthenware. What surprised me after it all was how non-scary and accessible slipcasting porcelain ended up being. I still have some glitches to iron out with bigger pieces, but overall, you can bet more of this luscious stuff will be popping outta this studio! 

Now, back to the mud for more tiles, that Friesian ornament and other clinky goodness! MUSH! 

"One of the things I learned the hard way was that it doesn't pay to get discouraged. Keeping busy and making optimism a way of life can restore your faith in yourself." ~ Lucille Ball

Share/Bookmark

Tuesday, September 27, 2011

The Eye of the Storm


Nine little molds patiently waiting for the chaos to ensue.

By the skin of my teeth I finished the ninth and final mold for the 2011 Christmas ornament, pulling it apart from the original just twenty minutes before we left for a weekend jaunt to a horse show.

They have to dry thoroughly, so I could probably start pressing around October fourth. I'm determined to fully stock my Etsy store by the first week of November for Christmas shopping, but we'll see how that goes! As we all know, life seems to enjoy throwing ringers, and I'm certainly no help. I generate my own like a fractal equation. Wish me luck!

Here's my studio floor after mold-making, strewn with clumps of dried clay and plaster shards. The remnants of my madness, and a metaphor for what's to come.

"This suspense is terrible. I hope it will last." ~ Oscar Wilde

Share/Bookmark

Wednesday, September 21, 2011

Spaghetti Monster Be Praised!


Success!

Oh thank goodness - it worked! Above is the second press mold and it popped off easily with the tweaks. Seven more to go.

What a tease...the plaster looks like a block of Fluff! 

Here's the ornament inside the mold box with freshly poured plaster (above). My mold boards are clear acrylic, which allows me to see what's happening inside. The boards are like a Chinese puzzle box until you get the hang of them, but this simple "L" design works great. I have this long version, but also a shorter version for small pieces. It's not technically necessary, but much handier. 

The boards are placed alongside the edges of the backing tile and clamped into place. Then the seams, where they meet each other and where they meet the backing tile, are caulked with earthenware clay to prevent plaster from oozing out.

But placing the boards alongside the tile edge resulted in a mold a snidge too thin for my liking, even though I mixed three pounds of plaster. It'll work just fine, but I'll have to be careful. The forces involved with tile pressing are pretty strong thanks to Sir Squish, my tile press. This fantastic press works like a charm because he's geared, and so a modest pull on his lever results in a lot of force on the mold. So much so that I've unintentionally broken a couple of rather hefty molds! 

But we want all that force because it ensures a good impression and a dense compaction of clay particles. This is my (silly) theory, and it is mine... ahem....AHEM...I think "shocking" the clay helps to dampen warp. I wonder if by smashing the particles through a slab roller (such as my Derby) helps to shock them into a new alignment, and then smashing them again in Sir Squish reinforces that alignment. 

I suggest this for two reasons. First, I've noticed zero warp in my round ornaments, no matter how big they are, implying that a lack of the "suspension" span between any corners prevents a sort of "pull" those corners could exert - but it also implies something about the particles and how they were aligned in the process. And second, I noticed in the fire of the 2010 ornaments that only those pieces that lined the side of the convection vents between the broken shelves warped - all those away from those vents, in the middle, were perfect.

Here you can see the clay caulking along the seams.

Anyway, what I decided to do to create a beefier mold for the next pour was to pop the boards up onto the backing tile. It's something I've been meaning to try, but I was a little worried about the boards sliding around.

Oops! A bit of a spill there on the right. I need to find a new mixing bowl for plaster. The one I'm using is rigid and large, so spillage is unavoidable. I need one strong enough for plaster's weight and the effects of mixing, but also flexible enough to squeeze in a spout when pouring. It has to be cheap, too, which is why thrift and dollar stores are great suppliers.

I was so happy to find this approach worked great, so I'll be doing this for the rest of the molds. I want a really thick block while also minimizing the use of plaster, and this piggy-back approach delivered.

We don't want to get thinner - we want to get fatter! Mission accomplished.

You can see the difference clearly in the image above. The thicker block on the right will let me press much harder.

You may be wondering why I'm making so many molds for an edition of one hundred, which when divided, allots about twelve castings per mold (excluding the ninth back-up one). Well, the first reason is that I want to be able to choose the best molds for production, those with the least amount of bubbles or other hiccups that require clean up later. The other reason is that for some inexplicable reason, some molds work better than others in terms of pulling, and I'd like options in this, too. Same methods used in making them, but oddly enough, each mold has its own personality and you don't learn it until you use it.

Mostly, however, it's because of the clay itself. Clay is abrasive while plaster is rather soft, even when cured. So every time I press clay into a mold, the clay abrades the plaster, progressively wearing down the fine details and edges of the cast. The moisture in the clay also compromises the mold, and after about six or eight castings, it can be too damp to use and must be set aside to dry again. I want each casting to be nice and crisp, so I'd rather pour a few more molds to ensure each collector gets a faithful piece. I also don't want to be slowed down in the casting process - when I get in a groove, I go. Creativity has its own inertia. So setting a wet mold aside and grabbing a fresh dry one keeps production humming along.

Technically, I should be able to get about twenty five to thirty pressings from a single mold. Ideally, I'd be using Hydro-Stone® instead of regular molding plaster because it's harder and would yield more castings, but its mixing process is still something I have to perfect. So for now I'll leave that for another day and groggier clay.

I'm really excited to see how the black porcelain turns out. Black is a rather unconventional color for Christmas, I know, but can you imagine how it'll look with its purple ribbon and the glow from tree lights?! Fitting for a Friesian I think! 

"The painting leads the painter, and it becomes an intuitive experience." ~ Ardath Davis

Share/Bookmark

Tuesday, September 20, 2011

Last Sabotages First


The one and only mold for the Unicorn.

This week is a mad dash to make ten open-face press molds before Thursday. One for the Unicorn (above) and nine for the 2011 porcelain Christmas ornament. They need to dry for about twelve days, then I can start casting.

The Unicorn was straight-forward. Mix, pour, pop apart. Done. Yes. No hitch. That couldn't be said of the ornament, however. Of course it couldn't. Silly me! It had to present a problem right out of the gate, in the making of the very first mold! Mix, pour, pop apart. WHAT. ACK!

Let me backtrack. I don't plan on making rubber masters of these ornaments because the integrity of the limited edition is important to me. So each of the 8-9 press molds needed for the edition of 100 are cast directly off the clay original. This means that if damage occurs to the original during this process, I have to fix it before I make another mold. Easy enough with oil clay. It does mean though that all I have is the original, so if it gets hosed beyond sensible repair, there would be no 2011 ornament.

On top of that, thinking it was efficient and clever, I simply resculpted the old 2010 ornament clay original, filling it in and paring it down to create the blank block I needed for the Friesian (which also means the 2010 ornament truly is done since I no longer have an original to mold). 

What I'd forgotten, however, was that in the process of making the last press mold for the 2010 ornament, it got pulled off its backing, too. All the heat generated by the curing plaster and the subsequent pulling had eventually loosened the oil clay from the backing tile and that bond had to give sometime. But since that last mold was a back-up freebie, I slap-dashed it and simply affixed the clay original back onto the tile with double-sided tape, then proceeded to make that last mold. This trick works great for resin or rubber, but barely for oil clay, for obvious reasons.

So flash forward to now: as I pulled the first press mold for the 2011 ornament apart from that 2010 backing tile, this happened:

CRIKEY! There it is, stuck in the mold. Those bulges along the edge are the casts of my thumbprints from squishing the "caulking" clay into the seams of the mold boards. Kinda pretty. You can even see the streaks left by the double-sided tape on the clay.

Good gravy. It was wedged in there really good, too. When I screw up, I certainly do a good job of it. At least I can find satisfaction in that.

But what to do?! Tearing this thing out meant it was a wash - the damage would be too great and I'd be left with one, untested press mold. Great. I needed to do three things, and fast:
  1. Get it out of there as undamaged as possible.
  2. Affix it back firmly onto the backing tile without using double-sided tape.
  3. Figure out why it got so stuck in there in the first place. If it happens now, it'll certainly happen with the porcelain, something we definitely don't want!
To attend to #1, I remembered Barb's advice about using the clay plugs to get the pressed clay out of the mold. So I warmed up some oil clay under a lamp* and gingerly duplicated that technique. With a bit of tugging (oi - it was really in there), I got it out with surprisingly little damage. Practically none. Phew! A thousand thank-yous again, Barb!
[*I heat my clay under a drafting lamp, using the bell of the light to contain the heat.]
Addressing #2 took a bit more doing. The backing tile is slick - glossy slick. This makes is easier for the plaster to be pulled off and for the tile surface to be cleaned in preparation for mold making. It also means that affixing a soft, smooshy clay piece firmly back onto it would be a tricky proposition. I just couldn't squish it on there!

So after thinking about it, I decided to do two things. First, I would smear a thin layer of heated, soft clay onto the backing tile in the rectangle mounting area. Really squish it on there good with a tool, too, then place it under a lamp to keep it soft and sticky.

Then I'd take a BBQ lighter and gently melt the backside of the original, avoiding sag or distortion, just until the backside became glossy and melty. Quickly grabbing the backing tile out from under its lamp sauna, I'd gently press the two together, like those glues you apply to both surfaces before attaching them together. When I actually did it, it worked like a charm. Phew x 2.

As for #3, it was clear the problem was a design flaw. As perpendicular and pothole free I thought the edges were, apparently they weren't. There's some degree of suction between the original, backing tile and plaster, which makes pulling them apart hard enough, but any edge not absolutely perfect has just enough extra grab to be a bigger problem. In short, any minute flaw along the side edge creates an imperfection for rigid plaster to grab.

Now I wanted to avoid the deep bevel the 2010 ornament had because it introduced some annoying problems for pressing. That was why I made the edges of this 2011 ornament straight up and down. After this mishap, however, it's clear that a bevel to some degree was required, if only for mold-making and demolding. Afterward the bevel could be pared down with a blade as a kind of mold flashing, and I suspect a dough blade would be the ticket. We'll see how that goes.

After all was said and done, here it is re-affixed, repaired, and retweaked with a slight outer bevel:

(Right) A new smearing of edging to create the slight bevel and to fill the gap between the bottom of the ornament and the surface of the tile. A gap will suck plaster behind the ornament, creating a "hand" that would tear the piece when pulled out. It doesn't matter if the edges are slightly wavy now, since they'll be cut away in the cleaning stage. (Left) All cleaned up. The glossy areas are parts that needed to be fixed and resmoothed with GooGone. So altogether - phew x 3!

This hiccup caused the loss of half of yesterday, so today will be busier than anticipated. And here I thought I knew just about all I needed to know simply from last year. I mean - how hard could this simple thing be? Ha! I have a sneaking suspicion that this piece has its own lessons to teach me, and trickier ones at that. That's ceramics for you. Let me just say it's a good thing I got an early start this year. 

"Never play a thing the same way twice." ~ Louis Armstrong

Share/Bookmark

Friday, September 2, 2011

Thinking Inside The Box


Earlier this year I started a new project I'd been contemplating for some time, and just finished the first batch. My Dancing HorseTM tiles are immensely popular, and I'm expanding on the designs to offer more variety. I'm slowly developing my Christmas ornament series, too, along with various other projects to offer more diversity on my Etsy shelves. But I've been wanting to offer goodies that are more technically realistic, more in line with what my regular customers collect. 

However, any such pieces had to be collectible, affordable, versatile and, above all, easily produced to keep up a steady inventory. That last bit is the sticky part. Realistic work is labor and time intensive, so it took some cogitation to come up with an idea that fit all those parameters. So ta da - introducing CubequinesTM!


Each piece represents a different breed, and they're all based on a 2.5" square -- the "cube." These are the first ten, and every year I'll come out with five new breeds. Their breed is inscribed on the side, but I haven't shown that because the letters need a lot of clean up in the waste castings.


They'll be produced in colored resin, maybe with opalescent finishes, and have magnets attached to their backs, making them functional art (something I have a particular weakness for). But I'm still debating on whether to sell them individually or as sets, and a lot of that depends on my cart options in Etsy. I'm also mulling over the run date of each design, but I think ultimately I'll feel my way with this series and keep my mind open. 


But being versatile designs, I plan to gussy some up in different ways and sell those as specialty items. Cold-painters are welcomed to paint them realistic colors, too, opening up new options. So overall, this series serves as a continuous outlet for my bas-relief collectors while also providing fun introductory offerings to new customers within the Etsy venue.


Now the reason for the 2.5" cube was because that's the size of my smallest clay slab cutter. The original idea was to contain the design neatly in those dimensions, allowing me to create pressed clay versions, too. But as my creative urges tend to do, I "colored outside the lines"! 


As for mud, it's conceivable I could make slipcast molds of each piece for slipcasting. The designs would have to be retooled to remove the deep undercuts and other features that aren't compatible with a rigid plaster mold (easily done with the waste castings), but that will have to wait a little bit. That kind of production is time and labor intensive, comparatively speaking, defeating their initial purpose a bit, but I definitely want to explore this option to create specialty items. Me thinks porcelain in particular is quite tempting! One ceramic option I definitely want to try is seating a couple of these pieces onto a 4x4" tile, tweaking the design a bit, and making a mold of that to open up options for installations and tile paraphernalia.


Another kind of clay these designs beg for is metal clay. I have big plans for a jewelry line in my Etsy store, and a PMC kiln is on my "must have" list for 2012. The cool thing about metal clay is that I can use its shrink rates to shrink down these 2.5" designs into more jewelry-friendly versions with relative ease. Once I have those smaller versions, I can make press molds and be off and running with collectible jewelry bobbles. I plan to sell them as separates to jewelry makers and beaders, sorta like collectible beads. I also plan to apply the same strategy to all my stamped clay tile designs!


Anyway, interestingly enough, the Quarter Horse, Andalusian, Clydesdale and Ardennes started out as generic versions, such as "stock horse," "iberian," and "drafter." But I thought to myself that if each cube was to be a different breed, why not leave the door open to sculpt them all? I'm glad I caught myself with this thought because now I won't have to worry about running out of subject matter. Though it will prove interesting when I get to color-based breeds, such as the Paint horse and Appaloosa! 


This series is a good opportunity to showcase rare or endangered breeds, too, such as Marsh Tackies, Abaco Barbs and Cleveland Bays. I also plan to expand the series into all equine species and hybrids, and I'm really looking forward to creating them. Kulans, Tahki and Hinnies, oh my! 


On top of that, I graduated from UCSC with a degree in Environmental Studies and I've long been wanting to combine that training with my art to help along those efforts, since I'm shamefully not using my degree now! Unfortunately just about all wild equids are on the Endangered Species Red List today, such as Mountain Zebras, Takh, Grevy's Zebras, Somali Wild Asses, etc. If it's not a caballine, it's probably endangered -- not cool in my book! Fortunately, I can use this series to aid their plight with some partnered projects and I'm really looking forward to that.


Another fun thing about this project was the "overview stage" in which I weighed each against the other when they were all roughed out. Altogether, they have to be a collection, be coherent as a group, and not just a pile of different ideas with a 2.5" constant. So I ended up retweaking a few of the pieces, such as the Andalusian, Morgan, Clydesdale, and Quarter Horse, to give them just a bit more oomphf to synch better with their brethren. 

They'll be cast by Bear Cast LLC, and I hope to deliver these first ten to Barry next week. I'll clean up the resultant waste castings and then he'll make the production molds and off we'll go! It's going to be so fun picking out the colors for the resin and I know that teal, purple, green and gold are definitely on the list! 

I'm so excited about this project, and I can't wait to get started on the five for 2012! But first, I have Christmas to contend with and sculptures to finish. In particular, that sproinging Arabian mare is definitely staring at me. I've slated her to be my first piece in bronze, so the faster I finish her, the faster I can start that leg of my journey. So much to do! So many ideas! That's a very good feeling.
 
"It is in rhythm that design and life meet." ~ Philip Rawson

Share/Bookmark
Related Posts with Thumbnails