Tuesday, February 26, 2013

The Method, The Madness and The Mystery—Part 2


I suspect this is how "my team" feels when I start a new piece. My tools were too busy weeping to pose for this pic. My hands won't even talk to me.

Welcome again to The Method, The Madness and The Mystery, a sculpting series following the creation of a frolicking Dutch Draft Horse stallion, "Himmy." If this is your first time here, you may want to pop on over to Part 1 to get up to speed.

In this Part 2, we're going to discuss some initial philosophies when I sculpt a new piece. Now I'm sure you're thinking, "Can we just get onto the sculpting, please?," but I assure you that introducing these ideas now will help you understand some points and choices later. So

The First Steps


When I start a new piece, I like to define some goals I'll use to decide when the piece is finished and successful. These goals are different with each sculpture and are part of the inspiration for their creation because, along with the fun and fulfillment, I consider each new sculpture a new learning opportunity, a new means to push my skills. I actually prefer to create "on the edge," of finding that boundary where I'm uncertain, nervous, and unfamiliar…and jump. Though I may be risk adverse in life, when it comes to art, I have no sense of self–preservation. So if I'm not thinking to myself as I sculpt, "What the heck am I doing?! This is going to be a disaster! I'm never going to be able to pull this off! What was I thinking?!," then I'm not pushing enough.


For better or worse, I also don't trust comfort zones and find that, at least for me, complacency tends to breed a false confidence that dampens "my team's" ability to really rise to the occasion. Instead then, I like "everyone" to be on wide–eyed Red Alert, and that only happens when I've thrown myself into a metaphorical howling abyss—screaming. Who needs sky diving when there's art? Just as in life then, horses are also teachers in the studio, and so Himmy will teach me to:

  • Nail the proportions and build of a really heavy draft horse.
  • Imbue a lively personality without appearing wild or unruly.
  • Recreate a winter adult coat fluttering in the gallop.
  • Achieve a sense of weightlessness despite his hulk.
  • Produce a sense of nimble speed despite the base.
  • Recreate a sense of billowing, splattering kicked snow.
All that means I'll keep working on Himmy until I've achieved these goals to my liking. But some of them won't be easy. In fact, I consider Himmy to be the most difficult concept I've tackled so far because of them. That may seem surprising, since Himmy appears to be relatively straightforward, but those goals actually entail elements more systemic than musculature, type, or texture. What's nagging my sense of confidence then? Life.


Here's the thing…realistic art aims to duplicate life as accurately as possible to fool the eyebut art is entirely different from life. Said another way, inanimate clay and a living animal are two totally different things. Really think about that. Let it soak in for a moment. Though that statement may sound absurdly obvious, it's surprising just how many artists don't fully anticipate the implications for realistic sculpture. What—how? Because it implies that sculpting what we see isn't how one sculpts realistically. Now I've been working on a sculpting series that deals with that specific issue in much greater detail, but in the interim we'll approach it from this angle…

Unconsciousness vs. Consciousness

In life, our brain 
automatically processes three functions of an equation commonly regarded as "reality." Being automatic, they're instantly recognized and processed by our unconscious mind both in field study and our studio and as such, tend not to be readily identified by our conscious mind.  

First are the natural physical forces, The Universals, such as kinetic energy, force (including centrifugal and centripetal force), gravity, mass, inertia, cause and effect, drag, friction, resistance, impulsion, thrust, contraction, rebound, center of gravity or mass, leverage, tension, equilibrium, acceleration, fluid dynamics, and a host of other effects. Using Himmy as an example, we instantly know that if he were alive, he'd be a massive hulk (being a draft horse), he'd be moving fast (since he's galloping), he'd be benign (since he's happy and excited) and that what he's running through is puffy and crunchy (we know the texture and qualities of snow). Our brain does this on autopilot as a function of the fight or flight response because it wants to make sure that Himmy won't trample us before it decides to admire him. We usually don't even notice this initial deduction has been made—it being so automatic—that is, if Himmy isn't running at us! Then we get out of the way before we look again.

Second is biological reality, what we think of as "anatomy." In its simplistic form, this allows us to identify a horse as a "horse" and different from a cow, hippo, or platypus. By the time we're old enough to sculpt realistically, we usually recognize a horse from a donkey, from a mule, between the breeds and perhaps even the genders. In targeted training for equine realism, we can then recognize sculptures with more accurate equine structure from others; we can recognize progressive degrees of equine feasibility in sculpture. We are then better able to factually and objectively answer the question, "If that sculpture of a horse was alive, would it be a viable horse?" These are The Givens, those aspects of structure that define the basis of equine realism—anatomy and biomechanics*. No piece of realistic equine sculpture can be "realistic" if it doesn't come as close as possible to technical accuracy, by definition, since looking like a horse and factually depicting a horse are indeed two very different things. For more discussion on equine realism in sculpture, you can download my article, "Walking the Tightrope; The Unreality of Realism," I wrote for The Boat here.


(*For the purposes of this series, biomechanics will now be considered interchangeable with anatomy, since the former is simply an inevitable expression of the latter.)


Third, once our brain has been educated—which is safe to say with horse enthusiasts—it automatically pinpoints The Variables, those factors that create further distinguishing aspects such as breed standards, conformation, grooming, tack, and preferred movement. With more training, the better we become at ascertaining these nuances. Having said that, however, no amount of prowess in The Variables can compensate for errors in The Givens when it comes to equine realism, which is precisely why they're Variables.

Our brain processes all of these three factors unconsciously so that our conscious mind can take them for granted and thus be freed to focus on those aspects that appeal to us—and there are lots of 'em with such a captivating critter! These features are The Irrationals, those aspects of our equation that are spontaneous and may be specific to cause and effect, such as individual features, expression, gesture, personality, presence, posture, motion, hair movement, etc. Indeed, The Irrationals are usually those very particulars that often inspire a new piece in terms of concept, design and composition. And like 
The Variables, no amount of prowess with The Irrationals can compensate for errors in The Givens. 

The fifth factor to all this is us! Our goals, our skills, our discipline, our workmanship, our knowledge base, and all those elements our brain draws upon to drive us in this art form—but we'll leave that for another blog series. Now there is a sixth factor, which is

Is Reality Really What We See? 

The sixth factor, the one staring me in the face, are precisely all those components not registered by my conscious mind, The Invisibles. I don't have the luxury of automatic processing with clay. It's just an inert lump. Instead then, I have to recreate self-contained, complete universe from scratch, so I have to readily recognize everything. Simply put, my brain cannot take anything for granted so that yours can. I refer to this hidden ingredient as "Living Moment" and it factors back in all those elements processed under our radar and so tend to go unseen.


See, here's the other thing about realism: despite all the elements we have to consider as we work, we still cannot factor out our own brains. And this is exactly the reason why simply sculpting what we see isn't how one sculpts realistically. Can you guess why by now? Yes! It's because your brain actually functions as a Reality Filter. What's more, your own unique circumstances of nature and nurture culminate into an individualized, custommade Reality Filter all your own. And the same applies to each of us. This is why different sculptures have different degrees of accuracy, and it's also why each of us pick up on different things when looking at the same horse or sculpture. It's why different artistic styles exist, too. So because each of our Filters has a unique set of priorities, goals, blind spots, habits, aesthetics, proclivities, and preconceptions, we each have our own unique view of reality. Ultimately then, all of our different Reality Filters are what account for every differing factor in realistic equine sculpture.

That's where my problem lies, and on two fronts: not only do I have to tackle my own Reality Filter, I have to tackle yours as well. This means I must constantly revisit the question, "What really constitutes reality?" In doing so, I'm obliged to address those very things unprocessed by my consciousness only because I can't rely on my Reality Filter to show me what reality actually is. This is why I prefer a Red Alert situation. Hey, no one on my team can get comfy when everything we're engaging is suspectincluding my own mind!


And it's here where Living Moment comes to our rescue. It's truly enlightening when you take a new look at something and strip away all your preconceived notions about how it should look. Only when you do thatonly when you can do thatdo you start to see reality as it really is rather than how you want it to be. Indeed, what reality is and what we think it is are two very different things, thanks to our Filter.

So because Living Moment involves effects usually imperceptible to our conscious selves, we need to learn how to recognize, interpret and translate them to infuse them into our clay. Yet our brain cannot do this on its own—it has to be shown how and then guided to maintain that state of awareness throughout the sculpting process. But this is neither easy nor intuitive because we're asking our brain to bring what's registered on the "automated" unconscious level up into our "manual" conscious level for objective analysis. Plus, our unique Reality Filters means those particulars are usually different for each of us. So in a way, Living Moment is to an artist's brain what Self–Carriage is to a horse. And like each horse is an individualone who will need different training methods to address his unique personality quirksso each of our brains will need its own customized training to help it perceive and translate Living Moment.

We'll explore some ideas on that to get you started, but once our brain gets the knack of it, it really keys in on the constellation of fleeting events unfolding every second as we begin to recognize how the different substances, structures, textures, components, features, emotions, and reactions in life are thus affected. Through this, innumerable little touches that input actuality into our sculpture are revealed, exponentially increasing our creative choices and taking our work beyond representation and into narrative, beyond formula and into serendipity. Only then do we start to See the full spectrum of reality and realize that we cannot separate a believable subject from a believable universe, that we cannot sculpt realism in a contextual vacuum. Realism isn't about sculpting a factual horse then, it's about sculpting a factual reality that happens to feature a horse.
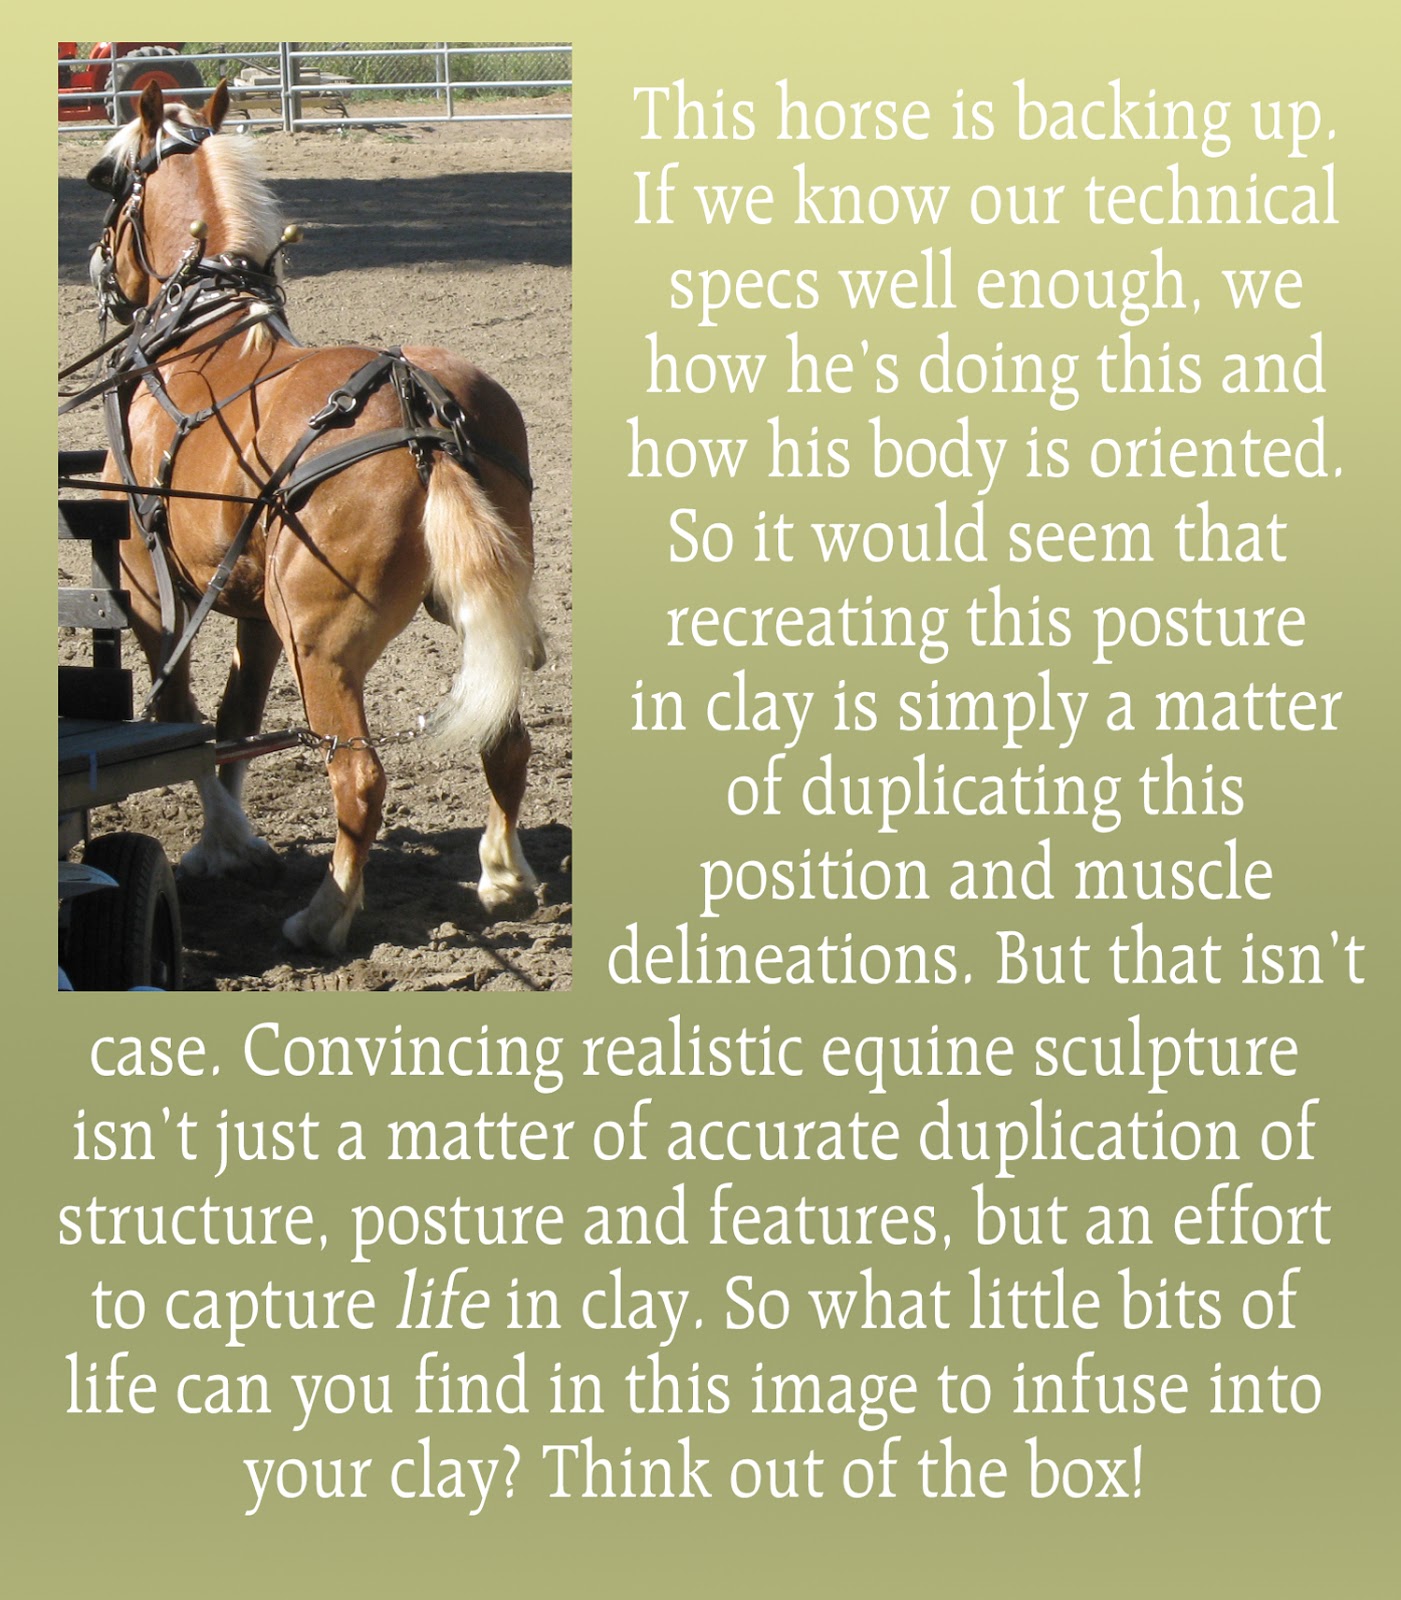


So What Exactly Does All This Mean?

Boiled down, Living Moment addresses just thatsculpting a factual reality, a complete universe. Because of this, it incorporates the physical forces and biological consequences our brain would otherwise take for grantedand thus tend to omit from clay—that impart a sense of immediacy, a sense of "realness," a degree of "changeability" beyond The Universals, The Givens, The Variables and The Irrationals. Altogether, the concept recognizes that no one moment is alike as each unfolding one is entirely new. This suggests that we cannot sculpt any two sculptures alike, right down to our anatomical interpretations. Heck, it suggests we cannot even sculpt each side of our subject the same! In all, we're quietly reminded that not only is each animal a unique individual, but each moment is unique, too. For some ideas on what that means for sculpture, refer to my twopart anatomy interpretation series here and here.

Practically speaking then, one way to think of Living Moment is that our sculpture is like a movie stilla single frame within a continuumwith these storyline components:
  • The Universals create a believable setting.
  • The Givens create a believable visual.
  • The Variables create believable value judgements.
  • The Irrationals create a believable individual.
  • Living Moment knits all this together into a believable plot.
  • Our mind is the interface.
In other words, Living Moment refers to the physics and biology applicable to our equine figure within the context of the scene portrayed. That means I won't be sculpting a draft horse galloping in the snow. That's only thinking of part of the equation. Instead, I'll be sculpting a universe in which a draft horse happens to be galloping in the snow. That's the full equation. Perhaps you can see now that there's a big difference between depicted movement and depicted Moment.


The Essential Dilemma

When we grasp this idea, we then start to see the implications for our sculptures. For instance, Living Moment indicates that aptitude in The Givens isn't enough. Sure, clinical expertise can take us pretty far in realistic equine sculpture, and it definitely takes quite a bit of effort to achieve in any measure. The equine is arguably one of the most difficult subjects to sculpt realistically, having stymied countless artists throughout the ages. Even Degas admitted great difficulty with the subject! So there's good reason why technical precision is such a struggle in the beginning of our careers, and why we work so hard to continually refine it.


Yet no amount of clinical accuracy can help us express the quintessence of a living creature or the transitory essence of life, as mountains of technical illustrations, anatomy charts, and representational pieces prove. So if we want our efforts to go beyond this, we're asked to go beyond positioning a 3D anatomy chart in different poses with different breed outlines. Flipping this over then, another implication is that the more we strive to sculpt with absolute clinical precision, the less realistically we tend to sculpt. Accurate anatomy may be at the basis of realistic equine sculpture, but if that's all we focus on, we're going to miss the most important component itselflife.


We'll explore all of this throughout this series, too, but it all comes down to this: just as horses "fill in" for us (as Tom Dorrance so wisely taught us), our brain fills in for art as well, and for realism in particular. Here's the deal summed up by this blunt quote: 
Realism has to be such high quality, you can't fake it. It's all hanging out there like the laundry. ~ Nelson Shanks
This art form is a kind of magic trick in that I'm trying to convince you that the illusion I've created is real enough to suspend disbelief for just a moment. Realism cannot be faked, fudged, or phony, which is why the more gripping works appear "more realistic" because they are more realistic. By definition, realism isn't something we can just make up—it's dependent on rules, The Givens. The more rules we perceive and employ then, the more convincing our work becomes.

But therein lies a trap, the belief that the more adept we become in duplicating the rules, the more correct and convincing our sculptures automatically become. And this is true
but only to a point, remember. Because we all know that Nature is as much about rules as it is about breaking them, and that idea applies to our sculptures as well. That is to say we must come to know the rules so well, and so far beyond a chart or illustration, that we also discover how and when to break them, too. And it's Living Moment that guides us.

We are sculpting living animals in mercurial moments, not anatomy charts or registry diagrams. So our work must be equal parts precision and organic if our brain is going to be truly tricked because this is what our brain already registers in life. Really, does your brain see a skinned horse galloping around a paddock in life, like an animated anatomy chart? No. It sees a living, organic horse. Put another way, your brain already factors in that organic nature unconsciouslyit simply takes it for granted because it takes the fact the horse is living for granted. Indeed, your brain automatically strips away features of the Living Moment to simplify the visual.


But when we look at a realistic equine sculpture, our brain unconsciously looks for that organic naturethat mental function is spinning in a loop looking for that stimuli in the sculpture that it finds in life. And in a piece that follows The Givens too literally, that circuit is tripped almost as effectively as if The Givens had errors. When our brain cannot find that organic, Living Moment element in a sculpture then, it will attempt to "fill in" for that missing ingredientand the moment it's forced to do so, the piece registers as "not real," and POOF—the spell is broken.

So
—yesthe quickest way to break this spell are errors in The Givens, but the more subtle way is an inadequate infusion of Living Moment. And in certain pieces especially, Living Moment can play a far more critical role in that spell's power than just about anything else…and Himmy is exactly that kind of piece. 

The Challenges

So in case you haven't guessed by now, five key Living Moment elements that will take center stage with Himmy are:

  • Weight vs. weightlessness (Himmy vs. his gait)
  • Impulsion vs. rooted (his gait vs. the base)
  • Resistance vs. velocity (his coat vs. the wind generated by his gallop)
  • Mass vs. fluffy (Himmy vs. the snow)
  • Flesh vs. velocity, impulsion, resistance and suspension (Himmy's fleshy bits vs. the act of galloping in snow)
And that's just the tip of the Himmyberg! If I'm successful then, Himmy will appear as if he's moving very fast and nimbly, as though he's floating during that suspension phase of the gallop, but also come across as the massive, powerful hulk of a horse he is. If I'm really successful, you'll also "feel" the crisp air ruffle his winter coat, you'll "hear" the snow crunch and pop as his dinner plate hooves smoosh and fling it, you'll "sense" the rumble of his hooves as all that bulk thunders by, you'll "see" the fluffy snow splatter, billow and spray under the kick of his heels, you'll "listen" for his snorting breath and blows, and you'll "connect" to his happy, joyful attitude. He'll have context; his moment will be complete. Altogether then, if I account for Living Moment well enough, your moment be transported to his moment and—for just a second—you'll share something with each other that mimics the same feeling you would have if he were real and you were there with him. 

That's the magic trick. And I sure hope I can pull this bunny out of the hat!


NEXT TIME: Part 3: Materials and Tools


"What is magic? In the deepest sense, magic is an experience. It's the experience of finding oneself alive within a world that is itself alive. It is the experience of contact and communication between oneself and something that is profoundly different from oneself; a swallow, a frog, a spider weaving its web…"  ~ David Abram

Share/Bookmark

Tuesday, February 19, 2013

The Method, The Madness and The Mystery—Part 1


This is how those Apoxie® Sculpt tubs look like to me.

This is Part 1 of a how–to series that explores the various techniques, philosophies, goals, and screw ups challenges that come into play when I sculpt a new piece. In it, you'll follow the creation of Himmlisches Herz, Dutch Heavy Draft stallion in approximate 1:12 scale, happily galloping in the snow. His name means "Heavenly Heart" in German, "Himmy" for short, and he's the first draft horse I've sculpted for production as an edition.

Brace Yourselves

To start it all off then, this Part 1 is a kind primer, an introduction, to the mayhem that's about to ensue. Why? Because this series is being written as I sculpt. There's no planning. No organization. No sequential logic. You're going to get the playbyplay as it unfolds. So if things seem chaotic, nonsensical, disorganized, haphazard—even a bit madthat's just standard operating procedure here. Really, "method" should be regarded only in the loosest possible interpretation because I pretty much wing it with each piece. Besides, what's creativity without adventure? 


This sums up my sculpting sensibilities. (The Mincing Mockingbird is my personal visionary.)

You'll probably notice some eccentricities in my methodology, too, such as how I measure proportion, my sculpting sequence and some of my prerogatives, but we'll get to all that later. But most of all, I aim to complete this fun fellow by March 5th (give or take a week). This impending deadline is deliberate, it being a kind of artistic exercise for me as well as a personal dare. I figure the best idea when back in the proverbial saddle is to start with a good gallop!

I'm also not convinced that the correlation between quantity of time and quality of art is infallible, even when it comes to realism. Granted, realistic equine sculpture is a highly technical, specialized art form that cannot be rushedit takes a goodly amount of time, resolute discipline, and painstaking attention to detail to ensure a quality piece. But I also remember the brilliant sculptures that were finished in relatively short order along with those works said to have taken inordinate amounts of time, but were seriously flawed regardless. I believe that our dedicated efforts should gift us with an economy of action so that our processes speed up and our problemsolving more targeted, with only the logistics of the media or the events in our lives to slow us down.

Yet even with all that, the rapid deadline is for Himmy's benefit, too. This sculpture portrays a draft horse galloping in the snow, right? Sure. But only at first glance! Dig deeper and we find he presents an enticing challenge. How? Consider the circumstance this piece encapsulates: an enormous 2,000 lbs (907 kg) animal speeding nimbly at a gallop through billowing snow. That's quite a juxtaposition of opposites!

We'll get to those issues next time, but meanwhile I have to consider this: a piece like Himmy often does best with a sense of urgency. A sculpture heavily dependent on motion is at risk of being overworked into a duller version of itself. And I do love the initial stages of bulking up an armature. Those blobs of clay and the casual abstraction born of working rapidly seem to capture the essential energy and charm that should lie at the core of the finished piece. And I've found, at least in my case, the faster I complete a piece like Himmy, the more of that primary energy is preserved.


Getting a bit ahead of myselfI love the armature stage! There's so much excitement when creating a new piece, and somehow that energy pours into the armature. My job is to keep it in there!

We're going to explore these themes and much more throughout this series, but first

The Common Question With An Impossible Answer

Years ago I wrote a howto series for the RESS ezine, The Boat, documenting how I sculpted Oliver, my Haflinger foal sculpture. Aptly entitled "The Birth of a Foal; The Method to my Madness," it helped to answer the common question, "How do you sculpt?" I'm often asked this question, as are many sculptors I'm sure, since the sculpting process can seem both bewildering and intimidating to those unfamiliar with the process. 

The upside is that I can go on and on about process, inspiration, and creative choices until the cows not only come home, but have a leisurely dinner, sleep and dream lovely bovine dreams, wake up the next day and then meander back into the pastureand I'd still be yappin'. And so a simple question is thus transformed into an epic saga spanning back to my first fumblings with crayons, my wee noggin filled with yellow and purple ponies romping around on stick legs and swishing broomlike tails. The downside, of course, that an otherwise curious, lifeloving soul is turned into a glassyeyed, lifehating zombie in no time at all.

So having blathered myself horse (ha ha!) and having created legions of traumatized zombies over the years, stillI must admit it's no easy question to answer. Oh heck, who am I foolin'? It's unanswerable! Sure, I can convey some aspects. I can even demonstrate some ideas and methods. I may even be able to relay some creative insights beyond structure or technique. But after all is said and done, the indescribable complexities of the whole experience knit with my own inner workings to congeal into a convoluted mishmash unique both to me and and the piece. This is true for every artist, and why an artist and her work are essentially the same thing.

It's also a matter of complexity. Despite how it may appear, realistic equine sculpture isn't just smooshing clay around until it looks like a horsethat's only the welcome by-product of years of study and practice. Skill makes anything look simple. So asking an artist how she sculpts is akin to asking a neurosurgeon how she performs brain surgery. Said another way, the question itself is so oversimplified that, quite literally, the only applicable answer is, "Well, I just sculpt it." That isn't to be rude, but to demonstrate the problematic nature of the question and, if anything, it reveals how perplexing the process can seem to nonartists.

Adding spice to the pot, each piece has a strange tendency to take on a life of its own. Honestly, every piece I've ever sculpted has seized control as if to use me as a conduit to self-actualize itself into being. It's the sculpture that makes my decisions and will even disagree with me and, curiously, always wins the argument. Even more curious, each sculpture seems to shape me in equal measurewe create each other. I'm not yankin' chains when I say that every time I finish a piece, I marvel, "I did this? How in the world?I can't believe I sculpted this!" But my experience isn't uniqueit's a common theme in many studios. Who can say what moves an artist to create as she does, but describing how a clear, complete idea in the hands of an experienced, confident sculptor always goes sideways simply because the sculpture "felt like it" is tricky to explain, at least without sounding like a complete goofball.

As if that wasn't enough, methods evolve in tandem with the artist. It's not just a matter of finding better techniques, either. Sometimes certain approaches simply fit with one's nature or way of working, or perhaps certain steps have a deep meaning that lend depth to the process. So it's not just the finished work that speaks of the artist's personality, but also the means by which she created it. This is why each piece is a kind of creative time capsule, a snapshot of the artist's essence.

Compounding all this, artistic creation is a solitary pursuit. Despite our collaborations or group efforts, and regardless of workshop settings, social settings, or shared studio arrangements, we retreat into our own mindspace the moment we focus. And so, sequestered in our own internal world, the creative experience is entirely our own, and our relationship with a piece is both deeply personal and very privateand there's no way to actually share or convey this experience in the full breadth of its bearing. Being so, the only way then to truly understand how I sculpt is to essentially be me. But again, this is true for any artist and, in this way, creativity is a struggle to make the intangible within all of us real, to be shared, to communicate and to connect.


In this sense then, the question really isn't how I sculpt, but why I make the creative decisions I do that culminate in a finished sculpture. It's really the whys that reveal far more because think about it—an artist has an infinite number of choices at any given moment when creating a new piece. It's not just a matter of an ear flick, head turn, leg position, or tail swish, either. It actually has far more to do the flick of the sculpting tool, the angulation of a plane, the texturing of an area, the accentuation of something here but not there, the smoothing of a feature like this but not like that, and a myriad other critical choices that go beyond mere posture, expression, or design. So asking the whys for those specific choices gives us insights into the artist's inner workings that can provide more useful ideas to take back into our studio.

How to Put The Impossible Answer Into A Useful Perspective

Put all this together, and there's really only one notion that best describes creativity: it's a mystery! Even to the artists themselves. And that's a wonderful thing. So while we may organize our thoughts or formalize our methods to teach them, or even streamline our techniques to facilitate productivity, it's that ephemeral component that always keep us guessing, wondering, and exploring.

That said, none of this precludes our sharing what we can. And let's face it, one of the fun things about creating art is sharing! It's also good for people to know a bit about an artist's process and motivations, if simply to gain a deeper appreciation for the ideas and efforts that percolate in the studio. It helps others to connect with our work and gain a better understanding of us on a personal level, too, because art is as much about our pieces as it is about our processes and our personality.

We also help other artists when we share. Heck, working in the same art form means we're all going to face similar challenges and probably have to problemsolve similar aspects. The more brains that work a problem then, the faster that problem is solved, and the better off we all are in this demanding art form. And even if we use the same methods and the same tools, our results are still going to be different thanks to that magic intermingling of self and stuff that lies at the heart of the mystery. Our work is as individual as we are, and that's brilliant. 

But before we start, here are some suggestions to keep this series in a useful perspective:

  • I'm only able to relay those components that can be broken down into shareable bits through images or words. Yet art is something learned through "feel" and there's no substitute for doing. So for the handson experience, I highly recommend Lynn Fraley's workshops. They're well–designed, artistically oriented, and lots of fun!
  • Always remember that what works for me may not work for you. Our methods aren't sacrosanct, but are just individually customdesigned habits, formalized steps that create a kind of predictability and comfort zone. So feel free to tweak any techniques I present to fit your own sensibilities and needs.
  • Similarly, the materials I use aren't for everyone, but the methods are certainly adaptable to any sculpting media. In fact, I use the same ones in slightly different ways for epoxy, ceramic, PMC, and oil clays. So please don't feel obligated to use the same sculpting medium I do. Instead, it's often better to simply use your own and adapt my techniques.
  • Put all that together and it means this: using the very same techniques and the very same materials that I use isn't going to produce the same results I achieve. Only I can produce those results because I am me—remember, that's the mystery of creating art. The best I can do is to convey some of the ideas that got me there, and the best you can do is take what you find useful and make it your own. This is how sharing techniques is so much fun!
  • The paradigms that guide my choices are founded on a blend of modern science and my own ethics that rest entirely on the wellbeing of the horse, from an evolutionary and biological point of view. I'll explain as I go, but know that Himmy will have features not present in my older pieces only because I've learned new information that produces different choices.
  • Please direct all questions to my Facebook studio page or email them to me. Keep in mind that I intend to share emailed questions on my Facebook studio page, since chances are if you have that question, so do others!
  • Don't be afraid to make mistakes. Rather than think of each mistake as a failure, instead think of each mistake as a learning opportunity, a chance to explore, question, and discover something new. Sculpting equine realism is one of the most difficult and demanding art forms ever, and you aren't going to master it any time soon, even if you have natural talent. So kick back and enjoy the journeyand be kind to yourself. And keep in mind that I've been sculpting for over twenty years. I've made a lot of mistakes, learned from themand I intend to make many more.

So in the spirit of the method, the madness and the mystery, let's kick off this sculpting series! We'll jump right in with Part 2, but until then you can download "The Method to my Madness" to start greasing the creative gears. In the meantimestay creative!

"The act of creation, making anything, is an alteration. We cannot eliminate the medium or ourselves from the process, and both are limited. We create decisive moments by devoting our time and attention to specific things. This is the greatest gift we can give anyone or anythingpieces of our life." ~John Paul Caponigro

Share/Bookmark

Wednesday, October 10, 2012

I ReDo that Taboo with Voodoo


Maury is so happy! He's done more firing in the last few days than both he and Big Al have done in the last few years combined!

As mentioned in the previous post, that Taboo came out of his final glaze fire with his pinking completely cooked out. This is common with reds (and to a lesser degree oranges and yellows), which tend to fade during the fire, especially if insufficient fresh air is supplied. This is why we like to keep at least half of our peep holes open (or all of them) if we have red–laden pieces baking away. Even so, reds are notoriously unstable and so pinking should be applied rather liberally to have any hope of adequate intensity after the fire. I've yet to figure out just how much that is though, and somehow manage to screw up on the side of the spectrum of "not enough" with hairpulling regularity. Such was the case with that Taboo.

Here he is, right out of the final glaze fire with all his carefully shaded pinking gone gone gone. BAH!

Creating art—especially in the learning stages—isn't all joy and rainbows and brilliant strokes of genius. There's actually quite a bit of bumbling around, accidents (both good and bad), total surprises (again, both good and bad), lots of pondering, and at times frustration and disappointment. It's messy. And sometimes you get mad. Indeed, sometimes you need to get mad since it can be the battering ram needed to bust down barriers to advancement, or said another way, to drown out that little voice of failure. Crafting art can be like boot camp at times it seems, and if that was the case here then that Taboo was the target I just couldn't hit. I needed a howitzer.

That's to say I needed a bigger toolbox. Cue in overglazes. I'd been wanting to play with this stuff for some time, using the nifty starter kit Lynn provided at the last Mudhenge. But it wasn't until Karen's handpainting demo that things really clicked into place for me because the techniques she demonstrated were similar to my ol' coldpainting methods. So with that Taboo defiantly staring me in the face, fatally flawed and excruciatingly irritating, there's no time like the present, is there? What do they say about necessity and invention? How does that saying go about getting mad and getting even? All clichés aside, that provocation really got the gears going, greased by my inherent stubbornness.

So with dubious abilities and blind enthusiasm, I just dove in, using pigments from the kits both Lynn and Karen so generously provided. Totally reckless. That shouldn't come as a surprise, though. As you may know by now, I'm not one to cautiously test the creative waters with a toe, properly outfitted with the appropriate gear and fully trained, to then carefully wade into the waters with one eye affixed on the shore. Nope. I get a running start and cannonball! BANZAI! *Splash* I'm lucky if I remember to take off my shoes.

Some of the materials enlisted to fix this puppy. That's a plastic palette and in the tins and tall glass bottles are the dry overglaze pigments. There are various mediums you can use to emulsify the pigmentsdepending on what you want to achieve and how you prefer the consistencybut here I'm using the glycerine Lynn provided in her kit (you can find it in the cakemaking or soapmaking isles in an arts and crafts store like Michaels). You mix the pigments directly into the medium (in this case glycerine) to the consistency you want. In my case, I aimed for the consistency of heavy cream and applied it with brushes.

To distill all that messy, "on the fly" learning into one coherent impression then: it was true love even before my bristles touched that shiny surface! Here was a fired media that combined with underglaze to produce results that not only matched my aims, but did so in a way more agreeable to my madnessinduced way of creating. So let me share some interesting things I discovered along the way so farand expect more as I wallow deeper in this marriage as I'm sure plenty more revelations are waiting! 

So first off, let's discuss some of the pigments I was using, those provided by Lynn and Karen

These are the colors I used on this guy. Lots of horsey colors are possible even with this limited palette, and the options are infinite with the addition of new pigments. Really, I suspect I'll be duplicating the massive coldpaint collection I have with overglaze pigments!

So here are some of the loosey goosey aspects of overglaze pigments:
  • You can utilize complementary colors to deepen, darken or enrich your target color without having to kill it with black. That means you can use blues, purples, greens, violets and such to amplify your palette.
  • Likewise, you can use pure brights to intensify highlights rather than relying on underlying white. So bright reds, oranges, yellows and the like can be used to punch up colors without the "pastel" effect of white.
  • You can custom mix your own colors from the large array of standard colors.
  • You can custom mix the consistency of your overglaze pigments through all the various mediums you can use. For instance, glycerine imparts the feel of oils thinned for glazing, or a thick watercolor feel. Conversely, fat oil creates a thicker, traditional oil paint feel. There's also lavendar oil, clove oil and many more mediums to suit just about anyone's preferences. I even successfully tried honey! 
  • You can use overglaze pigments in their glossy form (as–is), or turn them into a satin finish or further still into a true matte finish with zinc oxide, a matting agent available in powder form. You do this by grinding together the oxide in with the pigments in a (dedicated) mortal and pestle, varying the ratio depending on the effect you want. Then mix with your chosen medium and voila! You can then use the glossy versions on eyes, and the satin versions on hooves and nostrils for an array of appealing realistic effects.
  • Don't like what you just painted? No problem! Just wash it off with water and start again! Overglaze only becomes permanent when it's fired, so feel free to make as many changes you want before that happens.
  • You don't have to paint white markings or patterns! Amen! That tedious chore dreaded in cold–painting is totally circumvented in china painting only because your underlying (glazed) bisque provides the white background, so you simply wipe off the pigment from an area you wish to remain white.
  • You don't need an airbrush to china paint as brushes, sponges, or any assortment of typical cold–painting paraphernalia can be used instead. Keep in mind you'll have to adapt their use a bit, but that's to be expected with any media. That isn't to say an airbrush isn't an immensely handy tool in the glazing studio, however. I find that airbrushing on underglazes to block in areas with smooth, even gradients works better (and faster) than trying to do so with overglazes.
  • You never use water with overglazes, but only your chosen medium(s), thinning with glycerine when necessary.
  • You can keep your overglaze pigments and custom mixes in powder form in a suitably sturdy and tight–lidded container, or you can mix them with your chosen medium and store them thusly that way, too. You can even keep them on your palette (like many oil painters do) given that your palette is air–tight and covered to prevent debris and dust from contaminating the pigments. Gunk in your pigments makes painting a glossy surface rather tricky, and since overglazes fire at much lower temperatures (usually between Cone 016-018), not everything you'd expect to fire out actually will. 
  • Rather than waiting hours or days for your piece to cool down to apply additional layers with underglazing, you can more rapidly apply successive coats in overglazing only because of the lower temps involved. For example, after your kiln shuts off let it drop to about 1000˚F, then you can pop and prop the lid on the lowest "tooth." Then when it drops to 400˚F–500˚F, you can pop the lid fully for even faster cooling. For someone as creatively impatient as I am, this is a big plus! (I work in acrylics and color pencils for a reason!) But as always, exercise your good judgement here, as each piece and each kiln have their own tolerances and parameters.
  • Overglaze pigments fire pretty much WYSIWYG"what you see is what you get." On top of that, how you applied them also is pretty much WYSIWYG (with some exceptions, which I'll share as I discover them). This is in sharp contrast to underglaze where you have to paint "blind," and because chemicals combine and change during the fire, colors may be altered quite a bit away from what you'd expect. For someone who prefers a high degree of control and predictability—like me—WYSIWYG is always very appealing.
  • So far, I've found I get better results if I apply thin layers or washes rather than thick, gunky layers. Overglazes definitely have body, so if you glop it on it will result in a bump or ridge. If that's the desired effect, great! But if not, you can sand it off with a bit of elbow grease (and carefully with wetted wet/dry sandpaper in ultra–fine grit and with dust precautions), refire it, and then redo that feature in thinner layers.

Here we go! My very first interlude with overglazes on my own!

To crunch it all down to one idea thenif you're familiar with oils, watercolors, or inks, these overglaze pigments aren't too far afield in terms of feel and workability. But a few critical words of caution regardless:
  • Many overglaze pigments contain poisons and are highly toxic. So I recommend reading data sheets and sticking with the lead–free and cadmiumfree pigments, no matter how appealing a color may be.
  • Exercise common sense and caution with silica–based fine powders and chemical pigments or mediums.
  • As for mediums, you may come across references to motor oil or other such materials. Just remember that whatever you put into your pigments will be fired at over 1000˚F in your kiln, so safety issues with vapors and flammable materials are important, especially if your kiln resides in your house or garage. 
  • Use dedicated tools and containers for all your overglazing materials since these pigments are totally unlike those used for underglazing or coldpainting.
  • Above all, do your homework and exercise appropriate precautions to stay safe! We want you around to happily glaze for a very long time.

As for the pigments in general, Reusche is a dominant supplier (and made in the US to boot), and having used such pigments provided in Lynn's and Karen's kits, I can say unequivocally that they're wonderful. But here's the hiccup: Reusche sells its pigments only in bulk, which is both very expensive and rather impractical for our purposes. So if you want to sample of bunch of different colors out of curiosity, an eyepopping bill with be the unfortunate result. ACK! Nonetheless, check out Reusche's china painting catalog to get an idea of all the enticing colors availableand that's just one supplier!

Here he is during his final fire with overglaze! In theory, this should be it!

And there are many other suppliers! Better still, many of them offer Reusche pigments in smaller (affordable) quantities, or who may have their own custom colors created for purchase. Check out Ann Cline (recommended by both Karen and Lynn), Kathy Peterson's shopping pages, China Painting Today's store, Maryland China, Rynne China, and Colorific Porcelain, just to name a few. Pigments are typically sold in powder form by the dram. It's hard to say how far a dram would last, though, since we each would work differently and each piece has different needs. But I do hope to have a better handle on "dramability" as soon as I gain experience with a larger body of overglazed work. But I can say at this point that a little bit generally goes a long way!

Regardless, Karen reiterated to two important points to look for while choosing from all those lovely pigments: (1) are they lead–free and cadmiumfree?, and (2) do they all fire at about the same temperature range? Using pigments that demand rather different Cone temps can really complicate matters, so focusing on pigments that are both safe and compatible allows us to concentrate on creating rather than (avoidable) aggravations. Smart advice! With those two tips in my head, I can't wait to go pigment shopping! 

And hey, here's a tip: I'd initially mixed Persian Red and True White, with a tad of Brown (to richen it a bit), to create that coveted pinking tone, only this time in overglaze. But to my dismay, that dang Persian Red kept firing away, even at Cone 022! What was particularly interesting was that it seemed True White was the instigator of this vanishing act as those parts where Persian Red was used almost purely tended to stick better than those areas where True White dominated the blend. So after five attempts at trying to get Persian Red to stay, I got pugnacious and simply switched to another reddish color replacement in my White and Brown mix: Ebony Brown. Bingo! I got a nice pink that finally stuck around! Now on a piece of this tiny scale, you really only need an indication of pink here and there, so I still have to see if this pinking mix would be convincing on a larger piece where bigger swaths of color will be needed. Something to discover! Fun!

And ta–da! I did it! Say hello to GoTime Buster! I bet you can guess where his name came from! Pining for pink ushered in a whole new era for the studio, and I can't wait to really take the bit between my teeth and run with it! Feeling a bit like Buster!

And now to backtrack a bit, back to 2010I found it incredibly exciting that the blues, purples, reds, yellows, and oranges I'd used for underglazing ol' Buster also worked! This opens up even more possibilities since it suggests that our color mixes for underglazes may have more options beyond blacks for darkening and using the underlying white bisque for highlighting. Even more curious, those bright reds (and yellows and oranges) retained their potency a lot better than the reddish brownshmmm. Lots to experiment with in that department now as well!

So hey, here's the deal: if I can do all this, you definitely can, too! Having said that, though, clearly I'm a total neophyte right now. Not even a baby yet, really. Heck, I'm barely a zygote! But it's so inspiring to be literally looking out over a vast expanse of unknown territory, full of promise and peril, and surely with tall tales waiting to be lived and told! So come along with me and we'll chart it together, and here's a terrific resource to get you started! If you're serious about overglazing, too, becoming a member is a great idea because that opens up their archives rich in wisdom and insights.

In the meantime then, pop on over to Buster's album for more images, and also check out his 5day auction on eBay! I still can't believe I actually pulled this off, but it wasn't done alone! With the help and guidance of the wonderful mudhens, I made it up and over my 1,000 foot wall with nary a sweatso thank you gals! So much! You always seem to make the impossible not so impossible after all!

"Let your curiosity be greater than your fear." — Pema Chodron

Share/Bookmark
Related Posts with Thumbnails