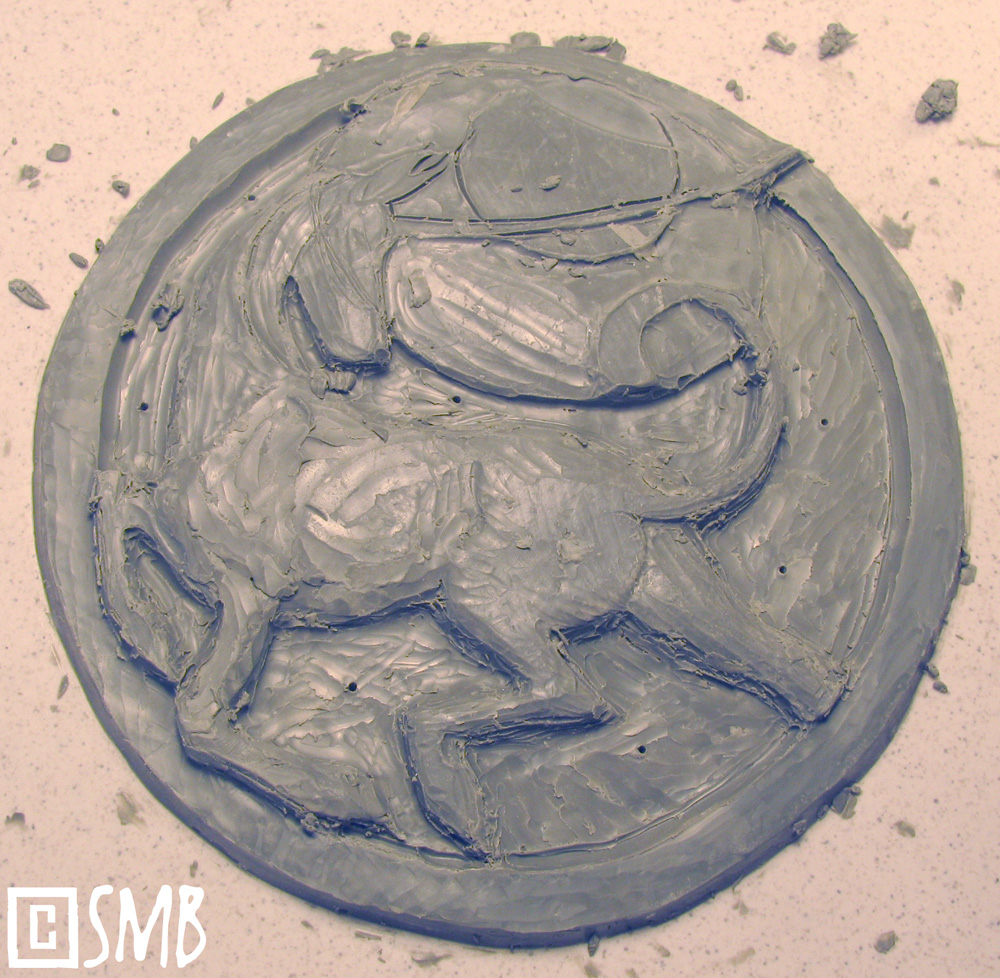
Shavings ruled the day with the "Suncorn." Lots of 'em.
This past weekend, I dove into that project I mentioned in a previous post - a pair of unicorn plaques with a sun/moon motif. You'll find that motif pop up in my giftware quite a bit because I'm attracted to the the idea of paired opposites. Of one not being able to exist without the other. Yin and yang - that sorta thing.
Anyway, this was my first expedition into sculpting pairs, and I thought it would be a cinch. No biggie. No big whoop.
But it turned out to be a project that involved far more royal-PITA work than I ever imagined, and all because they were paired. I didn't realize it at the time, but being a pair presents challenges not found elsewhere in sculpture, and which tend to complicate the cogs of creativity in truly maddening ways.
OK, here's the moon version roughed out, in the middle of the process (left) and at the end (right). Took a day - easy as pie. Now I had to sculpt its partner, the sun version. Here's where things get stickier than bubblegum on a hot sidewalk.
The encouraging, pristine block of cut-out clay for the sun plaque. It seems to be smiling at me, benign and enticing. Oh, how it lies!
Using a pair of locking calipers, I measured the side rim of the moon plaque and locked it, then used that to calibrate the thickness of the sun plaque by punching "measuring holes" along the rim. Being a pair, both had to be the same thickness. Seemed simple enough, but - wow - did it prove to be more annoying than I anticipated.
So here's the blank being shaved down. I start along the rim first, using the ridged side of a "squared" sculpting tool. However, I don't pare down directly to the measurement, leaving a little bit extra for wiggle room.
For the middle, I used the half-round because it rips off more clay faster.
Once all that's done, I laid a printout of my sketch on top of it. Using a stylus (any kind will do, even a dull pencil works well), I trace along the lines, pressing firmly. All my bas-relief pieces start from simple line drawings this way.
Traced in. Now I could have pared the block down completely and added clay "inside the lines" to build up the "outy" features - and in hindsight that perhaps would have been the better strategy. But squishing on sticky oil clay too much can make my finger tips sore, even blister them, so I often opt to pare down rather than build up.
Starting to cut out the design.
I used an old airbrush needle to poke holes at certain points in the moon plaque, and used a Sharpie to mark the needle for depth. I swear, I could write a book on the 1,001 uses for old airbrush needles.
I then poke that needle into the sun plaque to compare depths, and add or pare down accordingly. This process takes a surprisingly long time.
Here I am rechecking. You have to recheck constantly because it's easy to veer off-track without even knowing it. As for the outer border, I really liked the flat-side of the squared off tool for evening it out.
So I get almost done with the sculpting the unicorn, but I somehow got off-track and made him way too thick. It happens. I remeasured with the needle and ended up having to pare him down almost completely, erasing all those hours of work. Argh! But it's important not to get too married to anything in sculpture, because if it's gotta go, it's gotta go. And well, those front legs are looking weird to me, too. Hmmm.
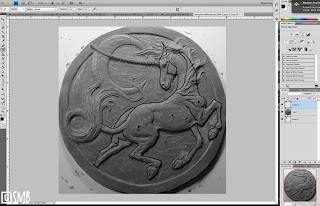
To complicate the deal, they not only have to match in terms of thickness, but also in dimension. BAH! Comparing things side-by-side works, but well...our human eyes just aren't that precise. I used my calipers and developed suspicions, but I wanted to be absolutely sure, mostly as a means to train myself. The more hardcore I was in this, the more my Eye would have to learn. So I took a picture of both plaques and loaded them into Photoshop for direct comparison. Here I've used the paintbrush tool to trace along the lines of the moon plaque in black (in a new layer so I could copy it and overlay it onto the sun plaque).
But it doesn't end there! No siree. Along with all the matchy fiddly work, I also had to stay true to the original design. All these constraints! Ack! I want to pull my brain out! So I loaded the original design into Photoshop and traced along the design with the paintbrush tool in white (also in a new layer).
Through a series of Photoshop comparisons, between the two unicorns and between the sun plaque and the original drawing, I could objectively discern where I went wrong and decide where to make adjustments. Interestingly, the dimensions between the two unicorns was very close, but I was way off compared to the original drawing. This was why the front legs looked so odd to me. (Here the colors were switched, white being the moon unicorn and black being the sun unicorn.)
What's handy about having a sized drawing to work from is using it as a template for shaping clay. Here I'm using snakes of clay to outline the flow of the tail.
Here are some of the tools I used. I love the loop tools for clay, with "U-turn," round and square tip shapes. But I also use that curved blade a lot, especially for carving edges or cutting in eyes and mouths. That longest one is my standard sculpting tool for all media. Its simple shape is deceptive - I find it a perfect sculpting tool for practically everything!
Another challenge I encountered with this project was "handed-ness." Unless we're ambidextrous, each of us are "handed," either left or right handed. Well, the same applies to sculpting - we usually have an "easier" side sculpting, especially when it comes to detailed bits like the head. This is why you sometimes hear a sculptor imply one side was easier to sculpt than another. In this case, I had to sculpt essentially the same unicorn, but flipped over, as each plaque had reversed unicorn designs. This definitely proved to be interesting.
It's easier to get around this glitch in a 3D sculpture because we can move it around to gain better access with our tools. Not so with a flat bas-relief. The backing tile totally gets in the way and so our handedness is shoved in our faces rather shamelessly. Indeed, sculpting that sun unicorn's head and mane became a real chore. Interesting.
Anyway, after much trial and tribulation, I finally finished the pair. They each measure 4.5" and are destined for tile pressing, which is why they've been sculpted in flatter style. I also aim to resin cast them, probably in colored resin to be sold "as-is" while still remaining paint-able by cold-painters.
I didn't want to make them exact, but slightly different, to be individuals. Even their horns are a bit different. But as a final check, I overlaid the sun plaque onto the moon plaque in Photoshop (hooray for the "opacity" option) and both were of near exact proportions, and surprisingly exact in the head. Woot! Mission accomplished - finally. BLORG. I debated about sculpting flourishes inside the border, or even motifs, like stars on the moon plaque and flowers on the sun plaque. But in the end I decided that would be distracting and such motifs would make them too kitschy, something I definitely wanted to veer from with unicorns. Simplicity often works best.
All said and done, the sun plaque took twice as long as the moon plaque, and only because of all the matchy-matchy adjustments. It near drove me nuts, though it was a good exercise. I've never had to do that before and it taught me quite a bit about process and perception. I think it's important to learn the discipline of sculpting, and there's no better way to learn than having to duplicate things, especially in reverse.
"It's a true test of discipline to remain in control and to not let the temptation of color force unwanted decisions." Scott L. Christensen

Trouble Comes in Pairs