

The one and only mold for the Unicorn.
This week is a mad dash to make ten open-face press molds before Thursday. One for the Unicorn (above) and nine for the 2011 porcelain Christmas ornament. They need to dry for about twelve days, then I can start casting.
The Unicorn was straight-forward. Mix, pour, pop apart. Done. Yes. No hitch. That couldn't be said of the ornament, however. Of course it couldn't. Silly me! It had to present a problem right out of the gate, in the making of the very first mold! Mix, pour, pop apart. WHAT. ACK!
Let me backtrack. I don't plan on making rubber masters of these ornaments because the integrity of the limited edition is important to me. So each of the 8-9 press molds needed for the edition of 100 are cast directly off the clay original. This means that if damage occurs to the original during this process, I have to fix it before I make another mold. Easy enough with oil clay. It does mean though that all I have is the original, so if it gets hosed beyond sensible repair, there would be no 2011 ornament.
On top of that, thinking it was efficient and clever, I simply resculpted the old 2010 ornament clay original, filling it in and paring it down to create the blank block I needed for the Friesian (which also means the 2010 ornament truly is done since I no longer have an original to mold).
What I'd forgotten, however, was that in the process of making the last press mold for the 2010 ornament, it got pulled off its backing, too. All the heat generated by the curing plaster and the subsequent pulling had eventually loosened the oil clay from the backing tile and that bond had to give sometime. But since that last mold was a back-up freebie, I slap-dashed it and simply affixed the clay original back onto the tile with double-sided tape, then proceeded to make that last mold. This trick works great for resin or rubber, but barely for oil clay, for obvious reasons.
So flash forward to now: as I pulled the first press mold for the 2011 ornament apart from that 2010 backing tile, this happened:
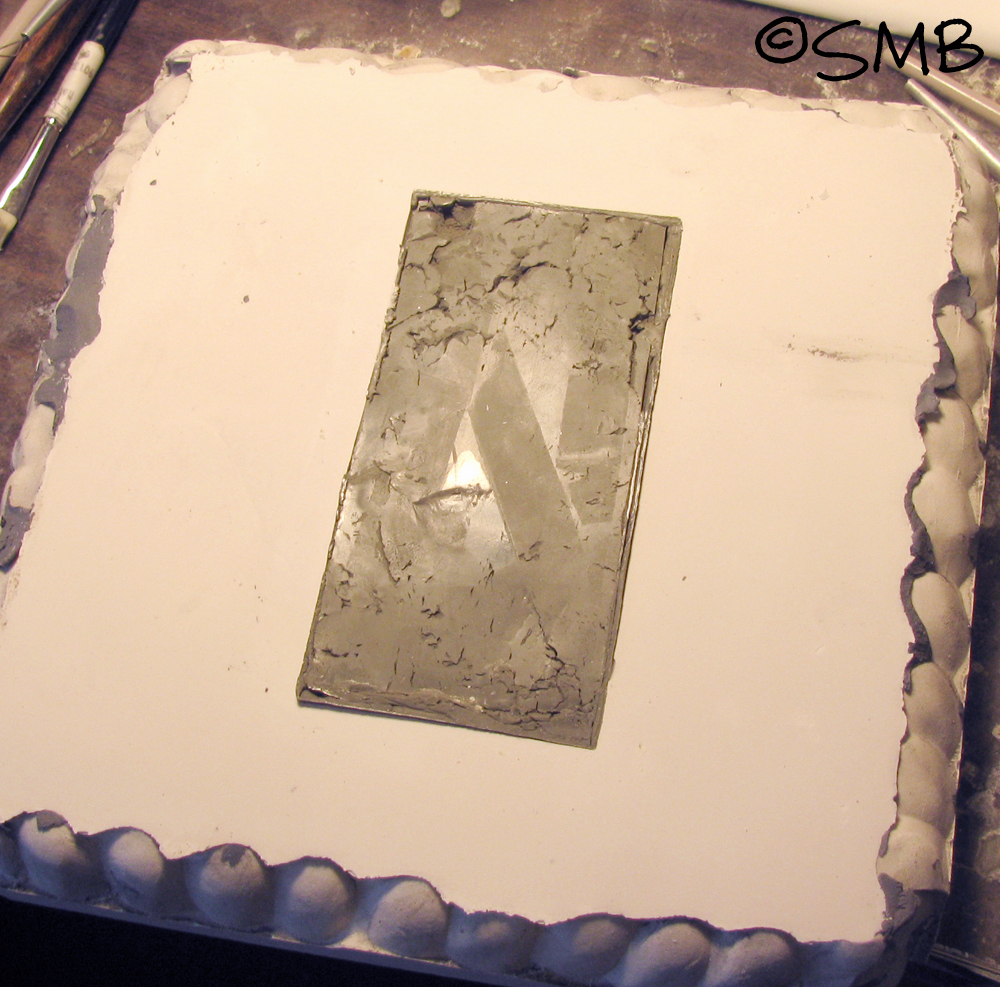
CRIKEY! There it is, stuck in the mold. Those bulges along the edge are the casts of my thumbprints from squishing the "caulking" clay into the seams of the mold boards. Kinda pretty. You can even see the streaks left by the double-sided tape on the clay.
Good gravy. It was wedged in there really good, too. When I screw up, I certainly do a good job of it. At least I can find satisfaction in that.
But what to do?! Tearing this thing out meant it was a wash - the damage would be too great and I'd be left with one, untested press mold. Great. I needed to do three things, and fast:
But what to do?! Tearing this thing out meant it was a wash - the damage would be too great and I'd be left with one, untested press mold. Great. I needed to do three things, and fast:
- Get it out of there as undamaged as possible.
- Affix it back firmly onto the backing tile without using double-sided tape.
- Figure out why it got so stuck in there in the first place. If it happens now, it'll certainly happen with the porcelain, something we definitely don't want!
To attend to #1, I remembered Barb's advice about using the clay plugs to get the pressed clay out of the mold. So I warmed up some oil clay under a lamp* and gingerly duplicated that technique. With a bit of tugging (oi - it was really in there), I got it out with surprisingly little damage. Practically none. Phew! A thousand thank-yous again, Barb!
[*I heat my clay under a drafting lamp, using the bell of the light to contain the heat.]
Addressing #2 took a bit more doing. The backing tile is slick - glossy slick. This makes is easier for the plaster to be pulled off and for the tile surface to be cleaned in preparation for mold making. It also means that affixing a soft, smooshy clay piece firmly back onto it would be a tricky proposition. I just couldn't squish it on there!
So after thinking about it, I decided to do two things. First, I would smear a thin layer of heated, soft clay onto the backing tile in the rectangle mounting area. Really squish it on there good with a tool, too, then place it under a lamp to keep it soft and sticky.
So after thinking about it, I decided to do two things. First, I would smear a thin layer of heated, soft clay onto the backing tile in the rectangle mounting area. Really squish it on there good with a tool, too, then place it under a lamp to keep it soft and sticky.
Then I'd take a BBQ lighter and gently melt the backside of the original, avoiding sag or distortion, just until the backside became glossy and melty. Quickly grabbing the backing tile out from under its lamp sauna, I'd gently press the two together, like those glues you apply to both surfaces before attaching them together. When I actually did it, it worked like a charm. Phew x 2.
As for #3, it was clear the problem was a design flaw. As perpendicular and pothole free I thought the edges were, apparently they weren't. There's some degree of suction between the original, backing tile and plaster, which makes pulling them apart hard enough, but any edge not absolutely perfect has just enough extra grab to be a bigger problem. In short, any minute flaw along the side edge creates an imperfection for rigid plaster to grab.
Now I wanted to avoid the deep bevel the 2010 ornament had because it introduced some annoying problems for pressing. That was why I made the edges of this 2011 ornament straight up and down. After this mishap, however, it's clear that a bevel to some degree was required, if only for mold-making and demolding. Afterward the bevel could be pared down with a blade as a kind of mold flashing, and I suspect a dough blade would be the ticket. We'll see how that goes.
After all was said and done, here it is re-affixed, repaired, and retweaked with a slight outer bevel:

(Right) A new smearing of edging to create the slight bevel and to fill the gap between the bottom of the ornament and the surface of the tile. A gap will suck plaster behind the ornament, creating a "hand" that would tear the piece when pulled out. It doesn't matter if the edges are slightly wavy now, since they'll be cut away in the cleaning stage. (Left) All cleaned up. The glossy areas are parts that needed to be fixed and resmoothed with GooGone. So altogether - phew x 3!
This hiccup caused the loss of half of yesterday, so today will be busier than anticipated. And here I thought I knew just about all I needed to know simply from last year. I mean - how hard could this simple thing be? Ha! I have a sneaking suspicion that this piece has its own lessons to teach me, and trickier ones at that. That's ceramics for you. Let me just say it's a good thing I got an early start this year.
"Never play a thing the same way twice." ~ Louis Armstrong


